Crochet Floral Summer Dress Pattern Outline

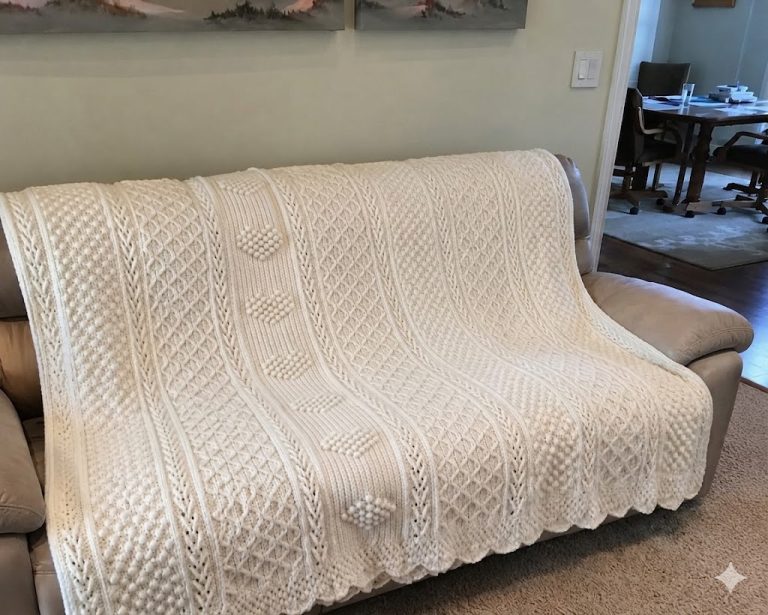
Crochet Kaleidoscope Blankets, perfect pieces for the coldest days and that can keep us warm when we are watching that beautiful movie on the comfortable sofa. Comfortable and beautiful is very easy to do. Crochet is very useful for decorative pieces that complete the look of the house with comfort, leaving everything very elegant. Perfect to decorate your sofa and make your living room elegant and relaxed. The crochet blanket has been used more and more and is already part of the decoration of many houses today, completing the same.
Use your creativity and make beautiful pillows to match the blanket, this can add a touch to your decor leaving it complete and very beautiful, believe me you will love the result. With little material and using your crochet skills and following the graphics carefully, you can make this magnificent blanket we brought you.
It can be a nice gift for someone who likes it a lot, to complete the decoration of your home or for sale as it is a product that is always sought to be acquired for the home today. Thank you for visiting our website. We always try to bring you the best.

See Also:
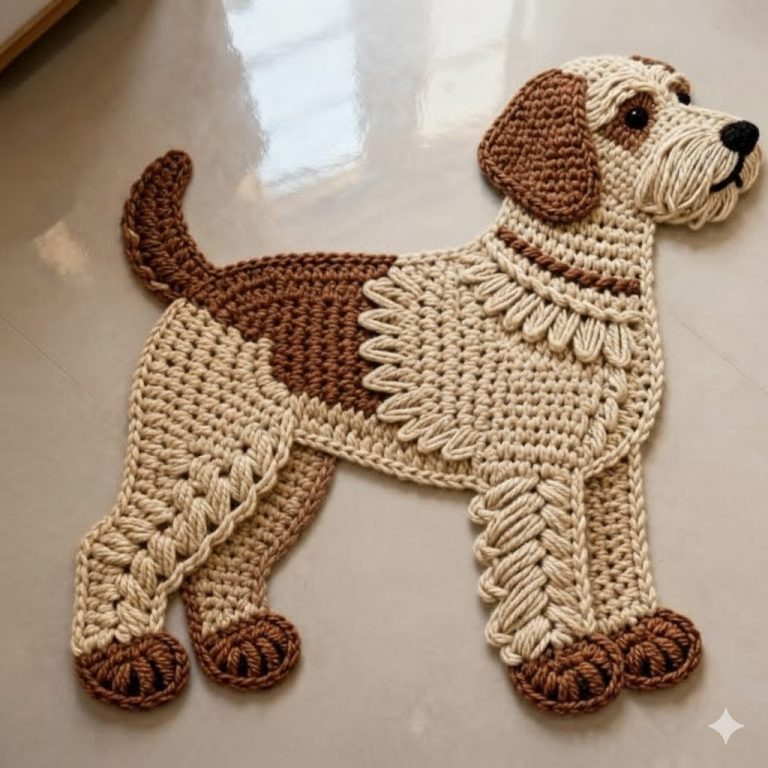
➽ Amazing Crochet Doily Rug
➽ Crochet Butterfly Top
➽ Crochet Block Gap Top
YARN:
Colour proportion determines the number of yarn eg. 5 coloured project to 5 skins of yarn. Preferably Red Heart regular super saver.
HOOK: 5.50mm.
GRANNY STYLE: 3DC Clusters with no chain st between and with a chain 3 on each corner always turning your work on every row, or the inside granny square will look different from the outer corners.
BEGIN:
Make a magic circle,
Row 1 – Ch 3, in Magic Circle… 2DC, Ch3, 3DC 3x’s. Ch2, Close Magic Circle. SC to top of Ch3. Chain 3 and turn. (turn every row on inner granny!)
Row 2 – 2DC in Ch2 sp, 3DC, Ch3, 3DC in next Ch3 space, repeat – 2x’s. 3DC around post of SC, Ch3 Slp st to top of Ch3. Tie off. Turn.
Row 3 – Change color, Slp st in any side space and Ch3, 2DC in same sp, 3DC, Ch3, 3DC in next corner. 3DC in next gap, 3DC Ch3 3DC in next corner, Repeat around to first cluster. Slp st to top of Ch3. Ch3 and turn.
Row 4 – 2DC in same gap, 3DC in each gap, 3DC, Ch3, 3DC 3Dc in each Corner cluster Ch3 sp. Slp st to top of first Ch3. Tie off.
Row 5 – Change color, Slp st in any middle gap. Ch3, 2DC in same gap. 3DC in every gap, Corner cluster [3DC, Ch3, 3DC] in every Ch3 corner. Slp st to top of first Ch3 in first cluster, Ch3 and turn.
Row 6 – 2DC in same gap. 3DC in each gap, Corner cluster in each Ch3 corner, Slp st to top of first Ch3 and tie off. Turn.
Row 7 – Change color. Slp st in any middle gap, Ch3, 2DC in same gap. 3DC in each gap and Corner cluster in each corner around. Slp st in top of first Ch3, Ch3 and turn.
Row 8 to 10 – repeat rows 6, 7. Do not turn at end of row 10!
Outside of square – With Slp st on hook, front of the last row is facing you. Slp St in front loop of each DC and loosely in each Chain. > Ch1 in center of each side. >Mark Ch1. Slp st to first Slp st and tie off. >See pictures in long notes above.
2 SIDED CONNECTION
First side:
Row 1 – Looking at it from the center out.. Slp st in 3rd DC of first center cluster, and Ch1. In marked Ch1 sp, 3DC, Ch3, 3DC(** Corner set) . Ch1, Slp st to 3rd, DC of cluster on other side of center.
Row 2 – Ch3, SC to middle DC of next cluster out. Turn work. 2DC in Ch1 sp. Corner set in corner Ch3 sp., 3DC in Ch1 sp. SC to middle of next cluster. Tie off. Turn work.
Row 3 – Change color. Slp st to 1st DC of next cluster out, Ch1, 3DC in SC, 3DC in next gap, Corner set, 3DC in next gap, 3DC in SC, Ch1, Slp st to 1st DC of next cluster.
Row 4 – Ch3, SC to last DC of same cluster. Turn work. 2DC in Ch1 sp., 3DC in next 2 gaps, corner set, #dc in next 2 gaps, 3DC in Ch1 sp. SC to last DC of same cluster. Tie off. Turn work.
Row 5 – Change color. Slp st to middle DC of next cluster. Ch1, 3DC in SC, 3DC in each gap, Corner set, 3DC in each gap, 3DC in SC, Ch1, Slp st to middle DC of next cluster.
Row 6 – Ch3, SC to 1st DC of next cluster. Turn work. 2DC in Ch1 sp., 3DC in next 2 gaps, corner set, #dc in next 2 gaps, 3DC in Ch1 sp. SC to first DC of next cluster. Tie off. Turn work.
Row 7 – Change color. Tie onto last DC on side. Ch1, 3DC in SC, 3DC in each gap., corner set, 3DC in each gap, 3DC in SC. Ch1, slp st to last DC of side, Ch3 and TURN
Row 8 – 2DC in Ch1 sp, 3DC in each gap, corner set, 3DC I each gap, 3DC in Ch1 sp. Pull out long loop or secure with a marker. Leave 4-5” tail. Cut. Turn
End of first side section
2nd – 4th sections:
You have the front facing you. Back up to the next side behind your hook hand (right for right handed, left for left handed)
Same as first, but at end of row 8, you will Ch1 and slp st to 3rd ch of row 8 on last section made.
Now undo long loop on first section row 8 and Ch1 and slp st to top of Ch3 of 4th section , Row 8. Turn work so back of row 8 faces you.
Row 9 – Tie onto any gap before inner square corner and Ch3. 2 more DC in gap, 3DC over Ch1 of Row 8 and through back 2 threads of Ch3 corner of inner square. 3DC in each gap around. Corner clusters in each corner Ch3. Repeat to beginning, Slp st in 3rd Ch of first DC.
Row 10 – Ch3 and turn. 2DC in same gap, 3DC in each gap and corner sets in each corner to end. Slp st into top of Ch3. do not turn.
Slip stitch row – slp st into front loops of each DC and Ch st. Add extra Ch1 at center of each side and mark it. Slp st into first Slp st. Tie off.
The next layer, will not end with the last color at the tips of the square you just completed. But the rows are treated just the same.
The Third Square:
Rows 1-12 – Do the same as rows 1- 6 on last outside corner sets.
You will end tied off rows at Row 12. You will be on your second run, through the color changes. So row 12 will be the end of your 1st color of the second go round. It will begin and end on the middle DC of the ‘second to the last cluster’ on each side.
This is the end of separate sides.
Row 13: Start a couple clusters back. Add 2nd color with a slip st and Ch 3 and work up to the inner corner. @Ch 1, Slp St into the last cluster on inner corner. (EXTRA STEP: T
urn work over so you can see the back of the slip stitch, Slp St into the “leg” of the slip st), Ch 2 Ch 1, Slp st into the 1st DC of the last cluster on inner corner, Do EXTRA STEP, Ch 1, 3DC in SC gap at each inner corner.] Cluster in each cluster around and corner set in each corner. Ch 1 and Slp St into top of Ch 3. Chain 3 and turn.
Row 14 – 3DC in each gap, Corner set in each corner , 3DC in Ch 1 sp before inner corner,
skip Ch 2 sp. Ch1, 3DC in next Ch 1 sp, and continue on around to beginning. Ch1 and slp st into 3rd Ch on Ch3. Tie off.
Rows 15 to 20 – Just 3 Color changes to go! Add 3rd color anywhere, and finish last 6 rows same as rows 7 -10 in inner granny square.
Outside Edge:
We are going to finish with a Barred Single crochet. This is one of my own stitches that makes a really nice two sided edge. We just went through a lot of effort to make this a two sided project, no need to have a one sided edge to top it off…. is there?
After your slip stitch, at end of row 20, Ch 1. and turn. You need the back side for this edge.
Slip stitch to Ch 1 and tie off.
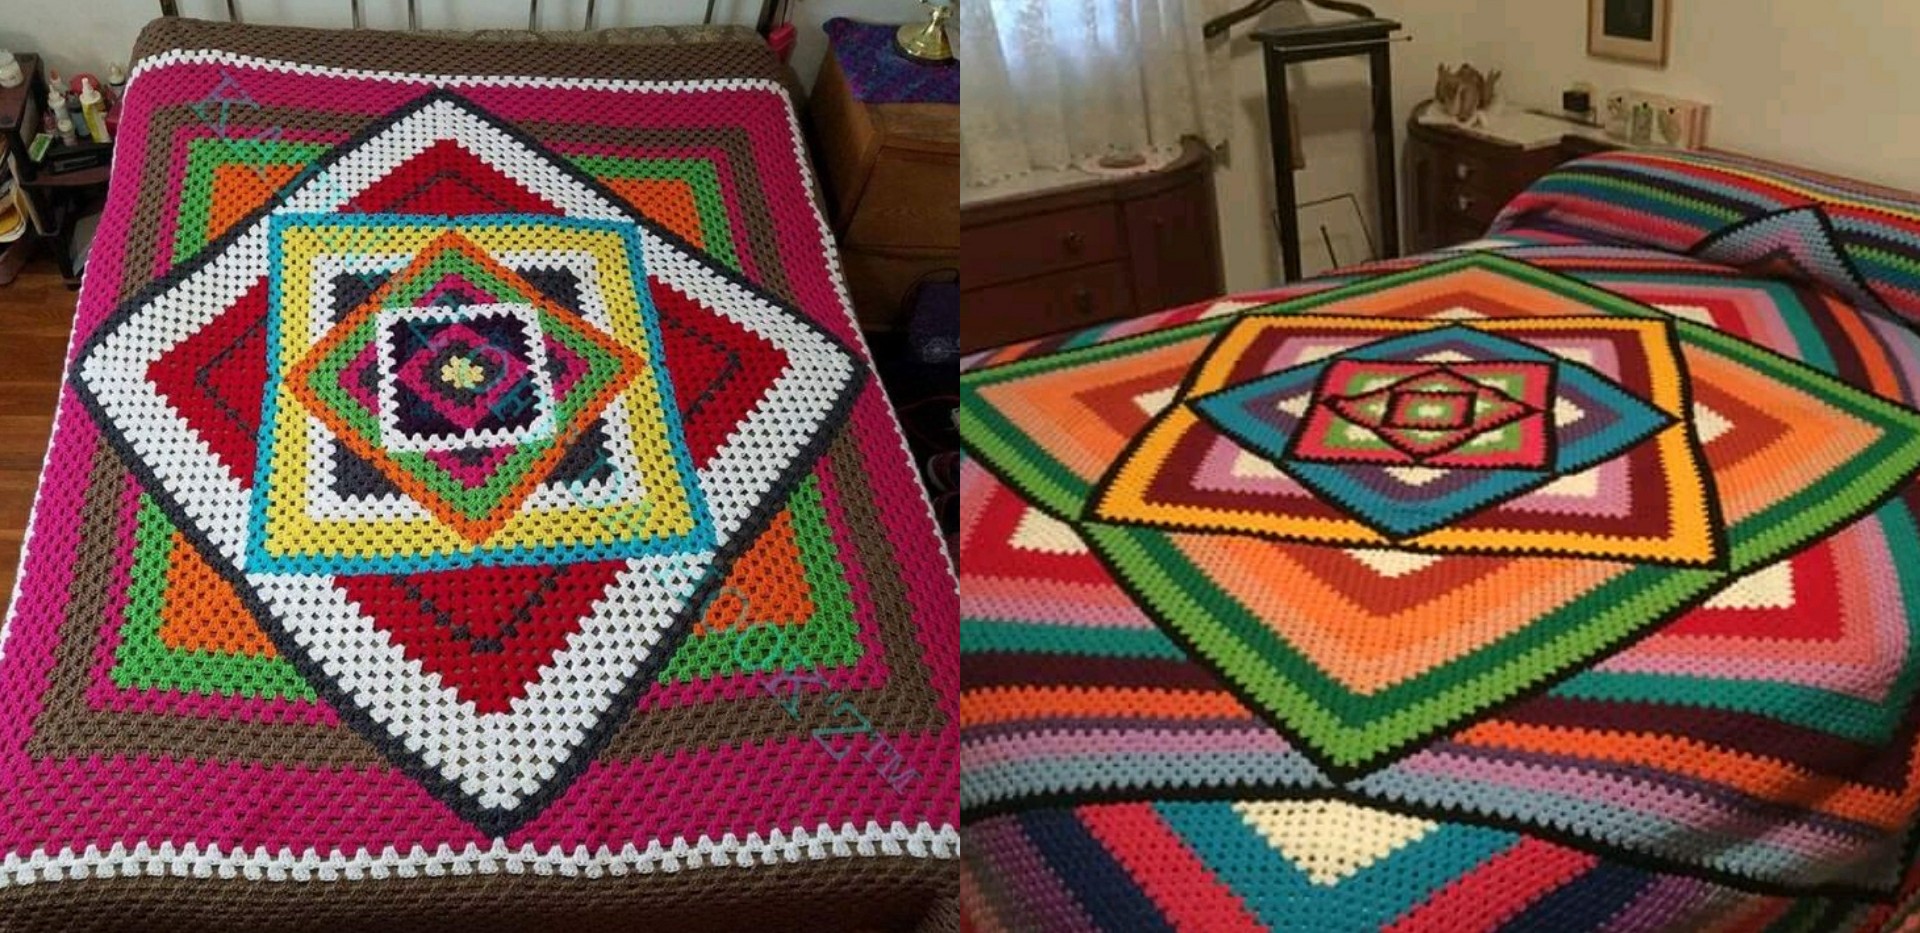
Crochet Kaleidoscope Blankets, the blanket that will surely provide a colorful and amazing decor for your house, i’m sure you’re gonna be amazed by the result, believe me, you’ll be amazed by the looks this amazing piece provide, they’re amazingly beautiful. This is a piece that is aways needed, that’s why it is so famous. This will surely make your customers want one like it, which will help you in sales!!
Want to make this amazing Crochet Kaleidoscope Blanket? Then set aside all your material and tools before starting your piece so that you already have everything close at hand, this way it’ll be easy to carry out this project, follow the tutorial carefully, make your piece while following the tutorial and I’ m sure that you will be able to make this amazing work easily.
