Crochet Floral Summer Dress Pattern Outline

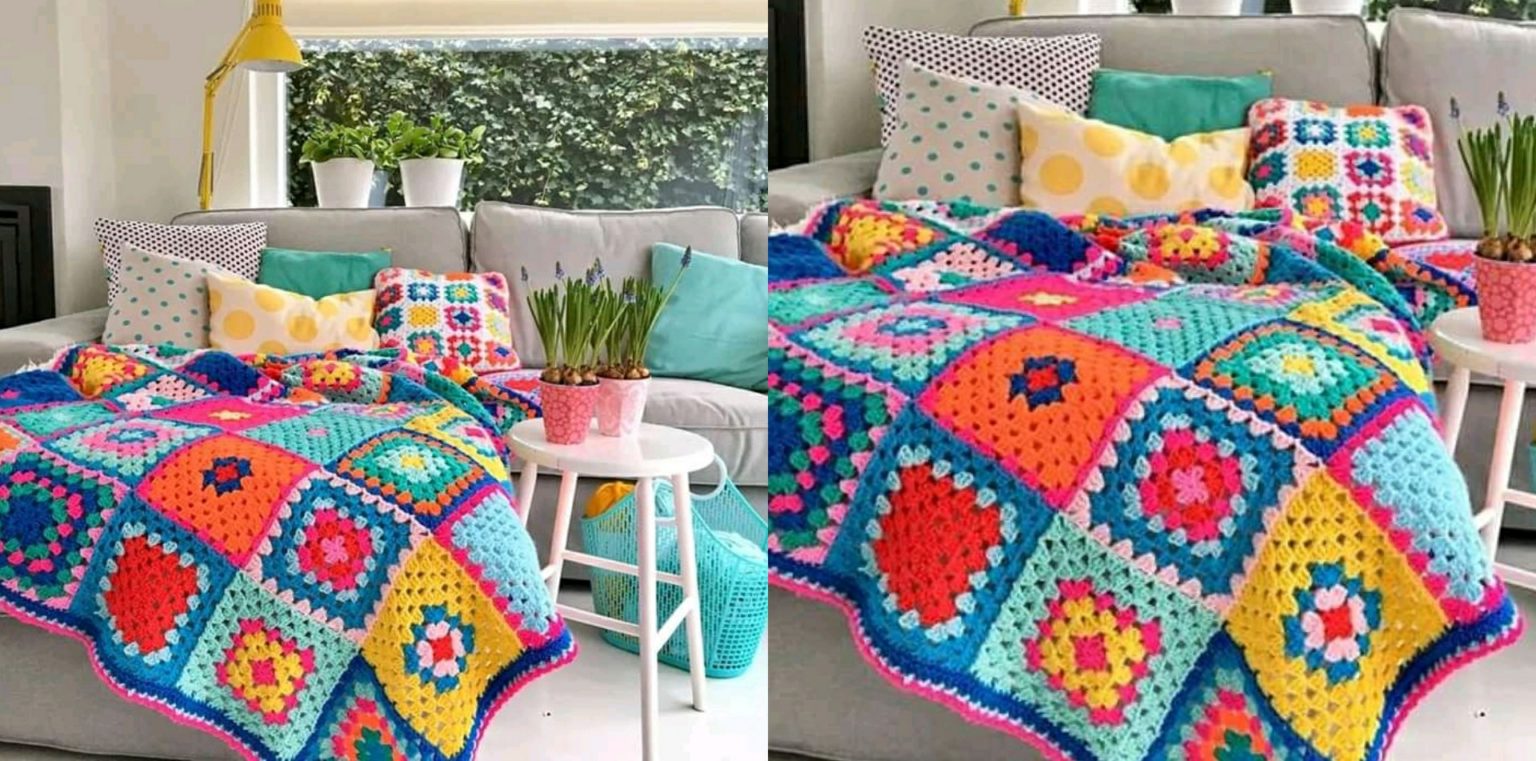
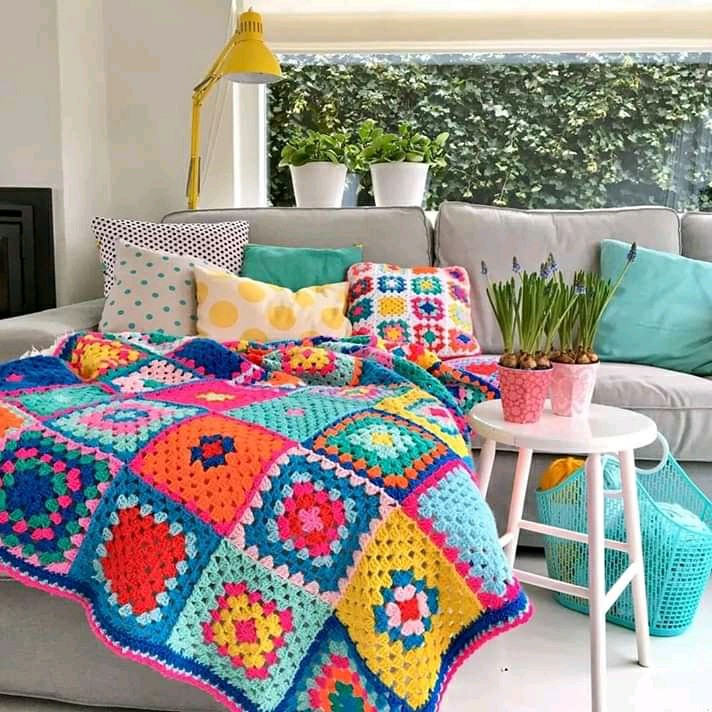
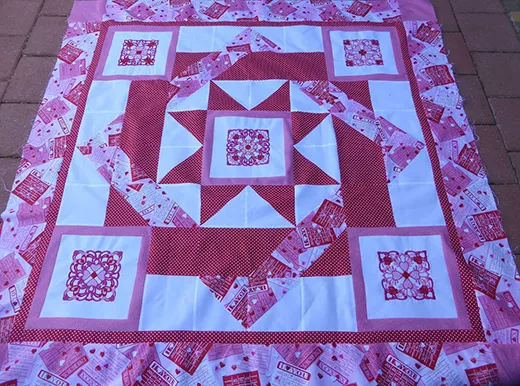
Granny Square Blanket with beautiful squares that have a very delicate and perfect final result to leave a very cozy and stylish environment. With a beautiful tone, it is a perfect piece to decorate the environment as it is very colorful with a beautiful variety. Comfortable and beautiful is very easy to make. Crochet is very useful for decorative pieces that complete the look of the house with comfort, leaving everything very elegant, like this work that we brought here today for you to make.
Granny Square Blanket very warm for those cold days that are coming, yet very easy to make and it looks wonderful, which helps you even more. Beautiful spots and square, therefore perfect to make the environment very cozy. With beautiful colors and details, if you want to decorate the environment this is a perfect piece.
Crochet is very easy and useful for decorative pieces that, certainly, complete the look of the house and make everything look beautiful. Giving some comfort and making everything even more elegant, above all, this blanket with crochet fringes will look great for sofa or bed.
See Also:
➽ Crochet Hexagon Blanket
➽ Popcorn Blanket
➽ Crochet Star Blanket
Materials
6 skeins of Purl Soho’s Worsted Twist, 100% merino wool
Inner Color: 1 skein
Middle Colors A + B: 1 skein each
Outer Color: 3 skeins
A size H crochet hook, or size needed to make a 5 3/8-inch granny square
A tapestry needle (also known as a darning needle)
Continue and let’s begin.
Another option: All of these materials, including the Pattern, come in our Granny Square Blanket Kit.
SIZE
Finished Dimensions: 25 x 31 inches
Round 1 Take your first colour and ch5, join with ss in fifth ch from hook to form a ring. Ch3 (counts as first dc here and throughout pattern), 2dc in ring (first granny cluster made), ch3, *3dc in circle, ch3; repeat from * another 2 times, join with ss in first dc. Fasten off.
Round 2 Join your next colour with a ss in a corner ch-sp, (ch3, 2dc, ch3, 3dc) in same corner ch-sp, ch1, *3dc in next corner ch-sp, ch3, 3dc in same corner ch-sp, ch1; repeat from * another 2 times, join with ss in first dc. Fasten off.
Round 3 Join your next colour with a ss in a corner ch-sp, (ch3, 2dc, ch3, 3dc) in same corner ch-sp, ch1, *3dc in next ch-sp, ch1, (3dc, ch3, 3dc) in corner ch-sp, ch1, 3dc in next ch-sp, ch1; repeat from * another 2 times, join with ss in first dc. Fasten off.
Round 4 Join your next colour with a ss in a corner ch-sp, (ch3, 2dc, ch3, 3dc) in same corner ch-sp, ch1, *3dc in next ch-sp, ch1, 3dc in next ch-sp, ch1, (3dc, ch3, 3dc) in corner ch-sp, ch1, 3dc in next ch-sp, ch1; repeat from * another 2 times, join with ss in first dc. Fasten off.
Weave in all ends.
Square Arrangement
The granny square blanket contains 135 squares if you join the motifs in 15 rows of 9 motifs. While you can make them all in advance and lay them down to determine your final arrangement, I made this blanket on-the-go. My way of doing this was by crocheting 15-20 squares. Then I chose the arrangement for 1 row from the squares I made, and joined those together.
repeated this for all the next rows. This way, you won’t have to think about the whole blanket in advance and you’ll have plenty of motifs to choose from while making your rows.
If you follow this method, keep an eye on ‘dark’ and ‘light’ squares. Dark squares are squares which have, for example, colour O and P in them. Light squares are squares which have colour D and E in them. Try to space these squares apart and never place two right above or next to each other, in rows as well as in columns. It’s just visually more appealing.
If you like a full overview of the blanket as I’ve made it, check out the colour placement image below.
Joining Motifs
First motif
Join joining yarn with a ss in any corner ch-sp, (ch3, 2dc, ch3, 3dc) in same corner ch-sp, ch1, *(3dc in next ch-sp, ch1) until you reach the next corner ch-sp, (3dc, ch3, 3dc) in corner ch-sp, ch1; repeat from * another 2 times, join with ss in first dc. Fasten off.
Subsequent motifs
Repeat the instructions for the first motif. However, when you reach a side that should be joined to another square replace the ch1
between granny clusters with ss in the adjacent squares. Replace the ch3 in corners with ‘ss in adjacent square, ch1, ss in next adjacent square’.
Border
Round 1 Join joining yarn with a ss in any corner ch-sp, (ch3, 2dc, ch3, 3dc) in same corner ch-sp, ch1, *(3dc, ch1) 3 times, 1dc in next corner ch-sp, dc2tog in same corner ch-sp and corner ch-sp on next square, 1dc in same corner ch-sp, ch1; repeat from * for each square until you reach the other corner of the blanket, (3dc, ch3, 3dc) in blanket corner ch-sp, ch1**, repeat from * to ** for each side of the blanket, join with ss in first dc. Fasten off.
Round 2 Join joining yarn with a ss in any corner ch-sp, (ch3, 2dc, ch3, 3dc) in same corner ch-sp, ch1, *(3dc, ch1) until you reach the next blanket corner ch-sp, (3dc, ch3, 3dc) in blanket corner ch-sp, ch1; repeat from * for each side of the blanket, join with ss in first dc. Fasten off.
Round 3-4 Repeat Round 2.
Weave in all remaining ends and block the blanket to size. If you’re not familiar with blocking, visit a blocking tutorial.
Granny Square Blanket, beautiful and stylish it will give your house a great new look that will truly amaze you! Believe me, the design and the colors of this amazing job will leave the ambience with a new look, it will certainly be perfect for you and your house, this will certainly make your customers want one like it to use on their house, which will help you in sales!!
Want to make this amazing Granny Square Blanket? So it’s simple, set aside all your material and tools before starting your piece so that you already have everything close at hand, so it will be easy to carry out this project, follow the tutorial carefully, make your piece while following the tutorial and I I am sure that you will be able to make this beautiful project easily.
