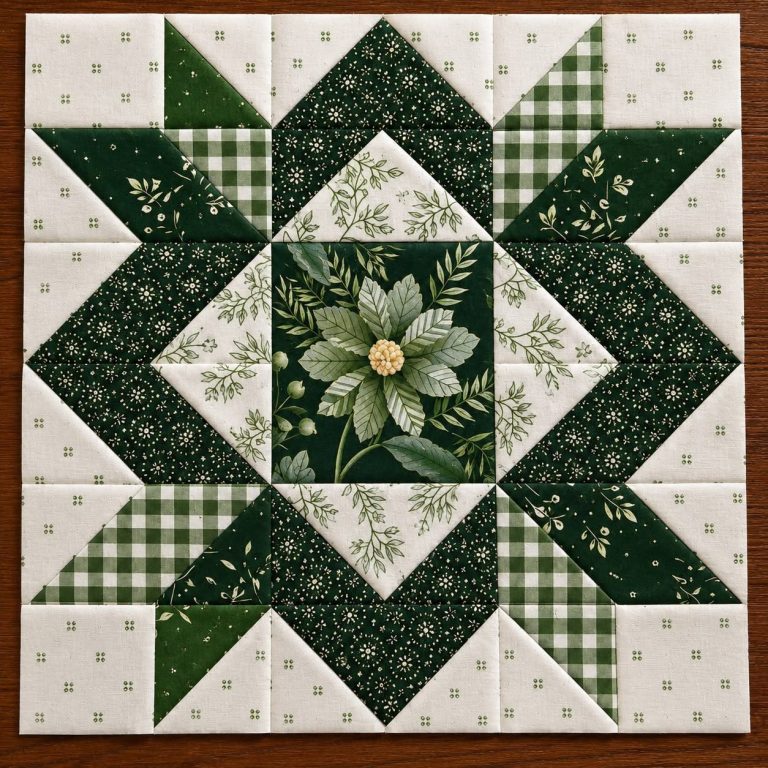
Green Floral Star Quilt Block

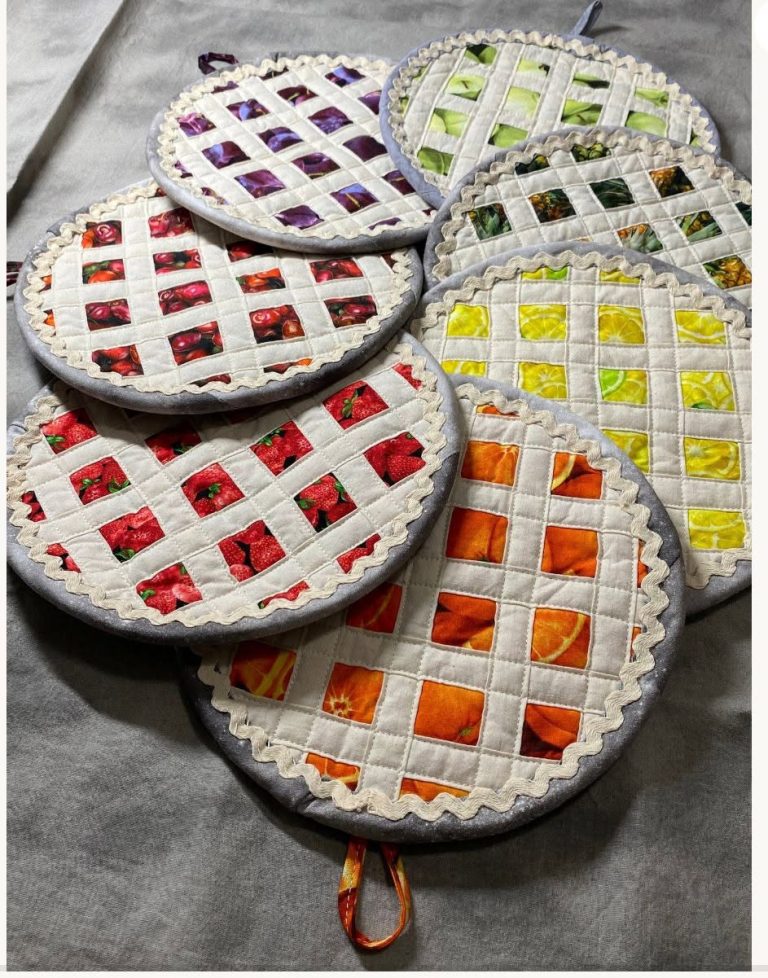
Bring a cheerful, handmade touch to your kitchen with these fruit-inspired quilted pot holders! Inspired by the reference image, this project combines colorful fruit-print fabric, a white lattice-style patchwork grid, soft quilted layers, gray binding, and delicate cream rickrack trim.
Make a set featuring strawberries, oranges, lemons, limes, or your favorite fruit prints. These pot holders are also lovely handmade gifts for housewarmings, birthdays, and anyone who enjoys colorful kitchen decor.
Craft: Quilting and patchwork sewing
Grid piecing, quilting, binding, and decorative trim
Skill level: Intermediate
Accurate strip piecing and curved-edge finishing
Finished size: Approximately 8 × 9 inches
A practical starting size; adjust the template for your preferred shape
Pattern note: The photograph does not include measurements, so this tutorial provides a complete, original construction method inspired by its appearance. The finished design uses a rounded rectangular or oval-like silhouette with a fruit-print window grid and decorative edging.
The quantities below are for one pot holder. Double them to make a matching pair, or prepare several different fruit-print panels for a colorful set.
| Material | Quantity and cutting size |
|---|---|
| Fruit-print cotton | 20 squares, 1¾ × 1¾ inches |
| White cotton for lattice | 10 strips, 1 × 1¾ inches; 24 strips, 1 × 1¾ inches for row dividers and edges, plus extra for corrections |
| White cotton for borders | 2 strips, 1½ × 9¼ inches; 2 strips, 1½ × 9½ inches, approximately |
| Gray cotton for backing and binding | ½ yard |
| Cotton batting | 2 pieces large enough for the finished template |
| Heat-resistant batting | 1 piece large enough for the finished template |
| Cream rickrack trim | Approximately 30–36 inches |
| Hanging loop fabric | One strip, 2 × 5 inches |
You will also need:
Important heat-safety note: For functional pot holders, use materials specifically suitable for heat protection, such as purpose-made heat-resistant batting combined with cotton layers. Follow the batting manufacturer’s instructions. Avoid polyester near hot cookware, do not use these pot holders in a microwave, and never allow them to contact an open flame. Test the finished item cautiously before relying on it for hot cookware.
| Abbreviation | Meaning |
|---|---|
| RST | Right sides together |
| SA | Seam allowance |
| WOF | Width of fabric |
| HST | Half-square triangle |
| Baste | Temporarily stitch or secure layers together |
| Topstitch | Stitch close to an edge for a finished appearance |
| Quilt in the ditch | Stitch directly along a seam line |
All measurements in this tutorial are in inches unless otherwise specified.
Use a consistent ¼-inch seam allowance for patchwork. Press seams after sewing, rather than pressing over several unpressed seams at once.
Choose a fruit fabric with bright strawberries, lemons, oranges, limes, or mixed fruit.
Cut 20 squares measuring 1¾ × 1¾ inches. These squares will become the colorful windows in the lattice pattern.
Arrange them in five rows of four squares. Alternate the prints and colors so the design resembles the mixed fruit pot holders in the reference image.
Press the squares flat before sewing.
Cut white cotton strips measuring 1 × 1¾ inches for the vertical dividers between adjacent squares.
For four squares in each row, you need three vertical dividers per row, or 15 dividers in total. Cut a few extras in case you need to replace a strip.
Place one white divider between the first and second fruit squares. Sew with a ¼-inch seam allowance, RST, then press the seam toward the fruit fabric.
Continue joining the remaining squares and dividers until the row contains four fruit squares separated by three white strips.
Repeat until you have five rows.
Cut white strips measuring 1 × 7¼ inches for the horizontal row dividers. The exact length may vary slightly depending on your stitching accuracy; measure the completed rows before cutting these strips.
Place one horizontal strip between the first and second rows, RST. Sew using a ¼-inch seam allowance and press toward the fruit rows.
Repeat between the second and third rows, third and fourth rows, and fourth and fifth rows.
The central panel should now resemble a grid of colorful fruit windows separated by white fabric.
For a more pronounced lattice, keep the white strips straight and the seam allowances consistent. The white fabric in the reference image is wider than a fine decorative outline.
Measure the central patchwork panel.
Cut two white border strips to match its long edges, adding ½ inch to the measured length for the seam allowances. Sew one strip to each long edge and press outward.
Measure the new width of the panel. Cut two additional border strips to fit the short edges, again allowing for ¼-inch seams on both ends.
Sew the remaining border strips in place and press.
The border provides extra room for shaping the rounded outline and makes the design look more like the reference.
Place the patchwork panel on a flat surface.
Using paper or a large plate as a guide, draw a rounded oval-like rectangle around the grid. The upper and lower ends should be rounded, while the sides remain gently curved.
Aim for a finished shape approximately 8½ × 10 inches, depending on the size of your panel.
Make a paper template first and check that it includes the entire grid with a reasonable border. If the grid is too large for the template, enlarge the outline instead of cutting through the fruit squares.
Cut the patchwork panel along the marked outline.
Using the shaped patchwork top as your template, cut:
Layer the pieces with the patchwork top facing upward and the backing at the bottom. Follow the manufacturer’s recommended placement for the heat-resistant layer.
Smooth all layers carefully. Baste with safety pins or long temporary stitches, keeping the layers flat and free from wrinkles.
Sew along the white lattice seams using straight stitching. Stitch in the ditch where possible, following the vertical and horizontal seam lines.
Quilting along the grid holds the layers together and reinforces the structure without covering the colorful fruit squares.
Next, sew one or two additional lines around the inner border, if space allows. Avoid excessive stitching that could compress the heat-resistant batting or distort the curved edges.
Trim away any excess batting and backing so all layers match the patchwork outline.
Cut a strip of cotton measuring 2 × 5 inches.
Fold it lengthwise, RST, and sew along the long edge using a ¼-inch seam allowance.
Turn the strip right side out and press with the seam centered on the underside. Fold the strip into a loop and baste the raw ends together.
Position the loop near the top edge of the pot holder, with its raw ends aligned with the raw edge of the quilt sandwich. Baste it securely in place.
Make sure the loop is clear of the main cooking surface and that the finished item will hang without pulling on the binding.
The reference image features cream rickrack between the patchwork and gray outer edge.
Place the rickrack along the perimeter of the patchwork top, with the decorative scallops facing inward. Keep the trim’s outer edge within the future binding seam allowance.
Baste the rickrack in place using a long stitch. Follow the curves slowly and ease the trim around the rounded ends without stretching it.
At the starting point, overlap the ends slightly and secure them neatly. Check that the scallops are evenly spaced around the entire shape.
Cut bias binding strips from the gray cotton, approximately 2¼ inches wide. Bias-cut binding is especially useful for rounded edges because it bends more smoothly than straight-grain fabric.
Join the strips diagonally if necessary to create one continuous length. Trim the seam allowances and press them open.
Fold the binding strip in half lengthwise, wrong sides together, and press.
Pin the raw edge of the binding to the raw edge of the pot holder, RST, starting away from the hanging loop. Sew around the perimeter with a ¼-inch seam allowance.
Take extra care at the curved ends. Stop with the needle down, pivot slightly when necessary, and keep the binding smooth.
Fold the binding over the raw edge toward the back of the pot holder.
Fold its remaining raw edge under and hand-stitch or machine-stitch it to the backing. Keep the stitches secure and evenly spaced.
At the hanging loop, make sure the binding encloses the loop’s raw ends completely.
Inspect the rickrack to ensure the scalloped trim remains visible and has not been accidentally tucked under the binding.
Before using the pot holder, check the entire project carefully:

Strawberry red
Choose bright red strawberry-print cotton with white lattice strips and gray binding for a fresh, cheerful look.

Sunny lemon
Yellow lemon fabric makes the white lattice stand out and creates a bright kitchen accent.

Orange citrus
Orange prints create a warm color palette that pairs beautifully with cream rickrack and neutral binding.
These fruit-print quilted pot holders are a delightful way to use small fabric scraps and bring color into your kitchen. The combination of a white lattice, bright fruit prints, cream rickrack, and gray binding creates a charming handmade look that is easy to personalize.
Choose your favorite fruit fabrics, take your time with the grid, and enjoy the process of creating something both decorative and useful. Leave a comment below or share your finished pot holders—we would love to see your color combinations!