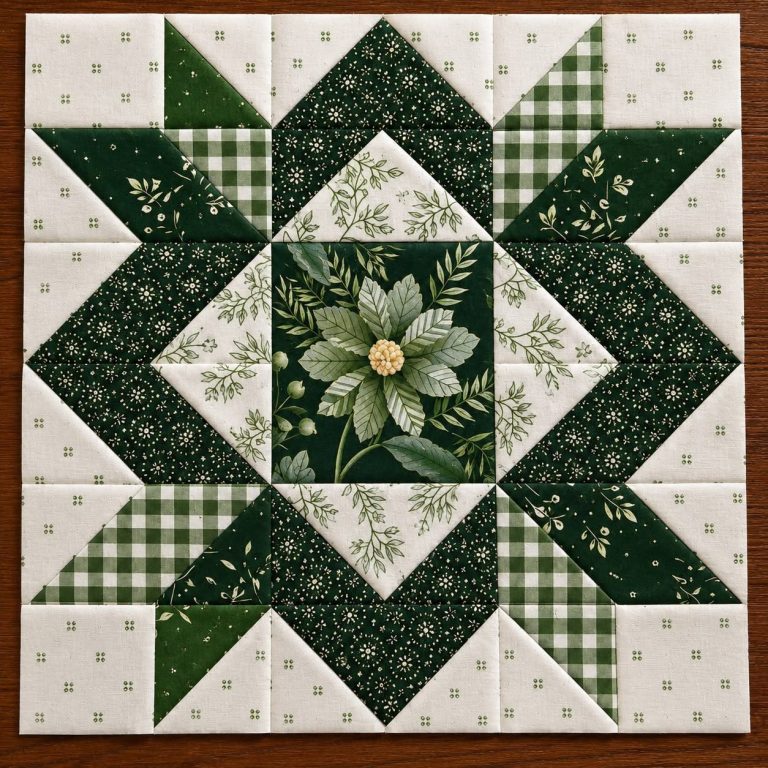
Green Floral Star Quilt Block

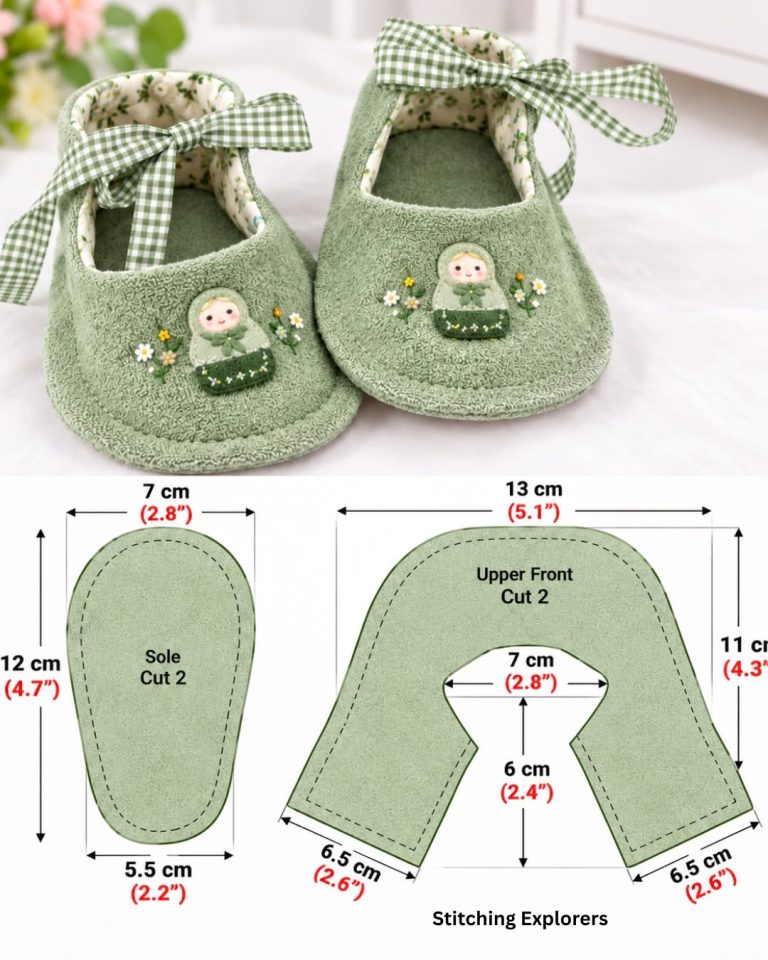
These sweet handmade fabric baby shoes combine soft sage-green cotton, a delicate floral lining, green-and-white gingham ribbons, and charming floral embellishments. Their rounded toes and open instep create a Mary Jane-inspired look that is perfect for baby shower gifts, newborn photography, special occasions, or a handmade baby wardrobe.
This sewing project is ideal for sewists who enjoy working with small fabric pieces and carefully finished curves. The construction uses an outer upper, a lining, and a shaped sole, with decorative bows added at the end.
Craft: Fabric sewing and soft-shoe construction
Fully lined baby shoes with decorative ribbon bows
Skill level: Intermediate
Small curved seams and accurate pattern matching
Pattern dimensions: Approximately 12 cm sole length
Based on the measurements displayed in the reference image
Important sizing note: The measurements in the supplied image describe the pattern pieces, not a guaranteed shoe size or age range. Measure the baby’s foot and check the finished shoe’s internal dimensions before using this pattern. The instructions below explain how to draft and sew a practical image-inspired version; the original full-size pattern and its exact seam construction could not be verified.

Outer fabric
Approximately ¼ yard (23 cm) of lightweight cotton in sage green, preferably with a small tone-on-tone print.

Lining fabric
Approximately ¼ yard (23 cm) of soft cotton with a delicate floral print.

Decorative ribbon
Green-and-white gingham ribbon, approximately 1–1½ cm wide, for two bows.

Lightweight interfacing
Optional, for gently stabilizing the outer fabric without making the shoes stiff.
You will also need:
Baby-safety note: Avoid loose buttons, beads, pearls, small detachable flowers, and unsecured appliqués. Decorative elements must be firmly attached and regularly checked. These soft shoes are decorative footwear, not protective walking shoes.
| Term | Meaning |
|---|---|
| RST | Right sides together |
| SA | Seam allowance |
| WST | Wrong sides together |
| Topstitch | Visible stitching close to an edge |
| Clip curves | Make small cuts in the seam allowance without cutting the stitching |
| Turn of cloth | The way fabric layers roll around a sewn edge |
| Baste | Temporary stitching to hold layers in place |
The reference diagram shows a solid outer cutting contour and a dashed inner stitching line. Use a 5 mm seam allowance for this image-inspired pattern, unless you deliberately draft a different allowance. The measurements below refer to the approximate cutting dimensions shown in the image.
Draw a rounded sole template on paper using the measurements in the reference.
Create a smooth, elongated shape with a rounded toe and heel. The outline should narrow gently toward one end rather than forming a perfect oval.
Cut out the paper template and label it SOLE.
Before cutting fabric, compare the template with the baby’s foot. The finished interior must accommodate the actual foot length and width with comfortable room. If necessary, enlarge the pattern proportionally and check how the upper fits around the foot.
The reference image shows an upper piece approximately 13 cm (5.1 inches) wide and 11 cm (4.3 inches) high.
To draft an image-inspired version:
Cut out the paper template and label it UPPER FRONT.
Pattern limitation: The diagram does not show every joining point or a separate heel pattern. The measurements above reproduce its visible proportions, but the upper must be tested against the sole and adjusted before final construction.
For a pair of shoes, prepare the following pieces.
| Piece | Outer fabric | Lining |
|---|---|---|
| Sole | 2 | 2 |
| Upper front | 2 | 2 |
Cut the sole and upper pieces using the paper templates. Arrange the lining pieces so the floral print faces the correct way when the shoes are assembled.
If using lightweight interfacing, cut matching pieces for the outer uppers and fuse them according to the manufacturer’s instructions. Avoid heavy interfacing, which can make small shoes uncomfortable.
For optional sole padding, cut two thin pieces slightly smaller than the sole seam line. This reduces bulk around the edges.
Cutting tip: Mark the center of the toe, heel, and upper opening on every piece. These reference points help you align the curved sections accurately.
Place one outer upper and its matching lining RST.
Align the edges around the central opening. Pin or clip around the curves, placing the clips close enough together to prevent shifting.
Sew around the central opening using a 5 mm seam allowance. Sew slowly around the curves, keeping the seam smooth.
Carefully clip the seam allowance at the curved sections without cutting through the stitching. Turn the piece right side out through the opening, then gently roll the seams into position.
Press with a low-to-medium iron setting suitable for the fabric.
Repeat with the second shoe.
Once the upper pieces are turned and pressed, topstitch approximately 2–3 mm from the edge of the opening.
This helps the lining remain in place and gives the shoes a neat finish.
Keep the stitching even and avoid stretching the curved edge. If the fabric begins to ripple, stop, lift the presser foot when appropriate, and reposition the fabric before continuing.
Fold and arrange the upper according to the drafted shape. Bring the sides into position so the opening remains centered and the front forms a soft rounded shape.
Pin the intended joining edges and compare the upper against the sole template. The outer edge of the upper must fit the perimeter of the sole without being stretched excessively.
If the upper is too long, adjust the pattern at the lower joining edges. If it is too short, revisit the drafted shape before cutting more fabric.
Do not force the pieces to fit. The visible dimensions in the reference are approximate, and the original seam layout is not fully shown.
Place the outer sole and lining sole RST. If adding thin padding, position it according to your chosen construction so it does not interfere with the seam allowance.
Sew around the perimeter, leaving a small turning gap at the heel.
Clip around the curved seam allowance, taking care not to cut the stitches. Turn the sole right side out through the gap and gently shape the edges.
Press lightly, then close the opening with a neat hand slipstitch.
Repeat for the second sole.
Mark the center of the toe and heel on both the upper and sole.
Match the toe centers first, then the heel and side points. Pin or clip around the entire perimeter, distributing any small differences evenly rather than creating folds.
Sew around the sole using a consistent 5 mm seam allowance. Move slowly around the toe and heel curves.
If the upper and sole do not align smoothly, remove the pins and check the paper templates again. Do not stretch the sole to compensate for a pattern mismatch.
Turn the shoe right side out and inspect the seam. Repeat for the second shoe.
Cut four ribbon lengths, approximately 18–22 cm each, depending on the desired bow size.
For each shoe:
Make two matching bows.
For a baby item, attach each bow with multiple secure stitches and check that no long, loose ribbon ends or loops can become a hazard. Do not leave detachable bows within a baby’s reach.
The reference shoes feature small doll-like appliqués and embroidered flowers. You can recreate the look with securely stitched fabric appliqués, embroidery, or small flower motifs.
For a simple floral decoration:
If adding decorations is not appropriate for the intended baby, leave the shoe fronts plain or use simple embroidery that is firmly secured.
Before considering the project complete, inspect both shoes carefully.
If the shoes are too tight, revise the pattern rather than stretching the finished fabric.

Cottage garden
Use sage green cotton, tiny botanical prints, and gingham bows for a look similar to the reference image.

Soft pastel
Combine blush pink cotton with a cream floral lining and matching ribbon for a sweet gift.

Neutral vintage
Choose ivory, beige, and muted gingham for a timeless handmade accessory.
Follow the care instructions for the chosen fabrics and ribbons. If the shoes are washable, use a gentle cycle or hand wash, then reshape and air dry completely. Avoid storing them while damp.
Because baby feet grow quickly, check the fit frequently and discontinue use when the shoes become snug.
These handmade fabric baby shoes are a charming project for anyone who loves delicate prints, coordinated linings, and thoughtful sewing details. With a little patience around the curved seams, you can create a lovely pair for a special occasion or a handmade baby gift.
Try your favorite fabric combination, keep the fit comfortable, and share your finished shoes with the sewing community. Leave a comment below and tell us which colors and prints you would choose for your own pair!