Half Log Cabin Quilt

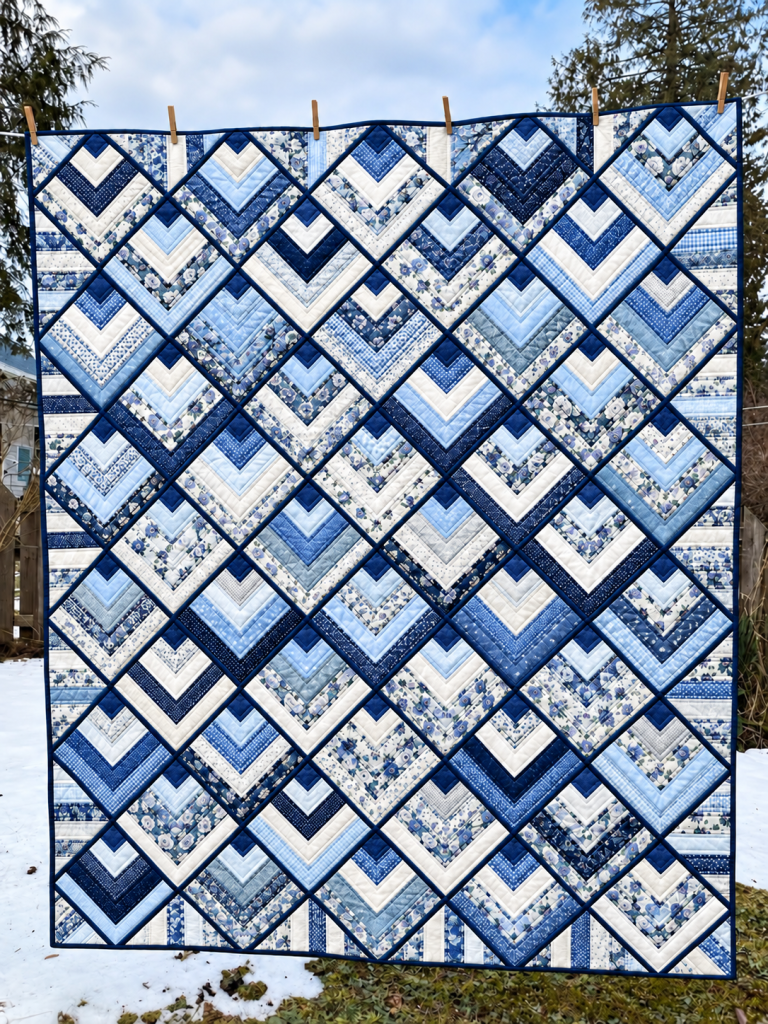
Bring timeless floral charm to your sewing room with this Romantic Rose Garden Chevron Quilt. Inspired by the quilt in our reference photograph, this design combines rosy pinks, deep burgundy, creamy white, sage green, and delicate floral prints to create a striking geometric patchwork quilt.
The design features layered V-shaped and diamond-inspired motifs, narrow green accent lines, and a mixture of floral and solid fabrics. These elements work together to create the illusion of interlocking diamonds running diagonally across the quilt.
Although the finished quilt looks intricate, the design can be created with basic strip piecing, half-square triangles, careful pressing, and a consistent quarter-inch seam allowance.
Project details
This is an original, photo-inspired quilt tutorial, not a verified reproduction of the original maker’s pattern. The dimensions below create a coordinated chevron quilt with a similar color palette and geometric feel. Small differences in the final layout are expected because the reference photograph does not reveal the original cutting measurements.
The following quantities are estimates for a quilt measuring approximately 56 × 64 inches. Buy a little extra fabric if you plan to fussy-cut floral prints or want to make a larger quilt.
| Fabric | Approximate amount | Purpose |
|---|---|---|
| Light pink cotton | 1 yard | Chevron strips and blocks |
| Medium pink cotton | 1 yard | Contrasting geometric strips |
| Deep burgundy cotton | 3/4 yard | Dark chevrons and accents |
| Ivory or cream cotton | 1 yard | Light chevrons and contrast |
| Pink floral prints | 1 1/2 yards combined | Main patterned areas |
| Green floral prints | 3/4 yard | Botanical accents |
| Sage green cotton | 1 yard | Narrow accent strips and binding |
| Low-volume neutral prints | 1/2 yard | Additional contrast |
| Backing fabric | 4 yards | Quilt backing |
| Cotton batting | At least 64 × 72 inches | Quilt filling |
| Binding fabric | 1/2 yard | Edge finish |
The amounts above allow for a scrappy assortment of prints, but actual usage depends on the arrangement and cutting efficiency.
Fabric preparation: Prewash fabrics if desired, especially deep burgundy and saturated pinks that may bleed. Press everything before cutting.
Use a consistent 1/4-inch seam allowance for all piecing. Accuracy matters particularly where the diagonal strips intersect, because even a small variation can cause the points to drift.
The key to the reference quilt is contrast. Each chevron motif combines light and dark fabrics so that the V shapes remain visible even when many floral prints are used.
Organize your fabrics into five groups:
For a balanced quilt, repeat each major print several times instead of using every fabric only once. This creates visual continuity across the diagonal layout.
For the strip-pieced chevron units, cut strips measuring 1 1/2 inches wide from the pink, burgundy, ivory, and floral fabrics.
Prepare approximately:
These are working quantities, not a guarantee that every strip will be used in full. Cut additional strips as needed after testing your block construction.
For narrow green accent lines, you may also cut 1-inch strips of sage green. These can be inserted between selected pink or floral sections for a more pronounced geometric effect.
Create several strip sets using different combinations. Each strip set should contain four or five strips sewn along their long edges.
For a light chevron strip set, use:
For a dark chevron strip set, use:
For a botanical strip set, use:
To sew each strip set:
Repeat until you have a selection of strip sets in light, dark, and botanical combinations.
To reproduce the thin green lines visible in the reference quilt, add narrow sage-green strips to selected strip sets.
The finished green accent will be approximately 1/2 inch wide after the seams are sewn.
Do not add green accents to every strip set. Alternating accented and unaccented units will create a more natural, layered appearance.
Use a quilting ruler with a 45-degree line to cut diagonal units from the strip sets.
For this photo-inspired design, the goal is to create repeated V shapes and diamond-like intersections rather than identical commercial-pattern blocks.
Keep some units angled to the left and others angled to the right. These opposite directions will form the V-shaped pattern when the units are joined.
Important: The exact width of each diagonal unit depends on the strip-set width and the ruler placement. Make one test unit first and measure it before cutting the remaining strip sets.
Place the cut units on a design wall or a large flat surface.
For each V-shaped motif:
Make a mixture of light-centered, burgundy-centered, pink-centered, and floral-centered V shapes.
Do not sew the entire quilt immediately. First arrange several motifs together and check that the colors balance across the layout.
Place the two selected units RST along the diagonal edge.
If the points do not align, check your seam allowance and the placement of the 45-degree ruler line. Consistent cutting and sewing will produce cleaner intersections.
Repeat until you have enough V-shaped units to create the quilt top.
For a straightforward rectangular layout, aim for a grid of 7 blocks across and 8 blocks down, using blocks that finish at approximately 8 inches square.
This gives a center section approximately 56 × 64 inches before any additional border is added.
Arrange the V-shaped units within the block areas. Some motifs may be split across neighboring blocks to create the illusion of continuous diagonal diamonds.
To keep the composition cohesive:
The reference quilt uses a dense, interlocking arrangement. You can create a similar impression by allowing the V shapes to meet at diagonal intersections instead of leaving large gaps between them.
Layout note: The block grid is a practical construction guide for this original interpretation. The exact number and placement of motifs in the reference image cannot be determined precisely from the photograph alone.
Work with one block at a time.
An 8 1/2-inch unfinished block will measure approximately 8 inches after it is sewn into the quilt.
Repeat for the remaining blocks. If your strip-pieced units produce a different block size, adjust the layout consistently rather than trimming some blocks much smaller than others.
Lay out all completed blocks in seven columns and eight rows.
Rotate individual blocks as necessary to create continuous diagonal movement across the quilt.
Look for the following visual features:
Take a photograph of the layout before sewing. This will help you remember the intended arrangement if the blocks are moved.
Start with the first row.
Repeat for the remaining rows.
Measure each completed row. They should be approximately the same length. If one row is noticeably longer or shorter, check for inconsistent seam allowances before joining the rows.
Place the first two rows RST, matching the vertical seams.
Pin at each seam intersection, especially where a green accent line meets a diagonal point.
Sew the rows together using a 1/4-inch seam allowance.
Press the seam open or alternate the pressing direction from row to row to reduce bulk.
Continue adding rows until the quilt top is complete.
Measure the quilt top in several places. The width and length should be consistent, and the edges should be as straight as possible.
The photographed quilt has a narrow green perimeter rather than a wide contrasting border.
For a similar finish, cut:
Attach the side borders first:
Attach the top and bottom borders in the same way.
If you prefer the quilt to resemble the reference image more closely, keep this border narrow and use the same sage-green fabric for the binding.
Cut the backing fabric and batting so they extend at least 3–4 inches beyond all four sides of the quilt top.
For a top measuring approximately 56 × 64 inches, use backing and batting of at least 64 × 72 inches.
Layer the quilt as follows:
Check the entire quilt for wrinkles and shifting before quilting. The backing and batting should extend beyond the top so that the edges remain covered during machine quilting.
The reference quilt has dense diagonal quilting that follows the geometric layout.
For a similar finish, consider these options:
Diagonal line quilting: Stitch parallel lines along the major diagonal directions. This reinforces the diamond and chevron design.
Stitch in the ditch: Quilt along selected seams to emphasize the patchwork structure.
Echo quilting: Sew additional lines just inside the V-shaped motifs to highlight the nested chevrons.
Free-motion quilting: Add gentle curves or loops in selected floral sections if you prefer a softer, less geometric texture.
A walking foot is useful for straight diagonal lines. Use a quilting foot for free-motion work.
Start near the center and work outward to reduce puckering. Test the stitch length and thread tension on a layered scrap before quilting the entire piece.
After quilting, trim the excess batting and backing so that the edges are even.
Cut sage-green binding strips 2 1/2 inches wide. Join them diagonally to create one continuous strip long enough to cover the perimeter, allowing extra length for joining the ends.
Inspect the finished quilt for loose threads, skipped stitches, or uneven binding. Remove any remaining marking lines according to the marking pen manufacturer’s instructions.
Use floral prints in the wider strips and solid pinks in the narrower strips. This gives the quilt a romantic garden feel without losing the definition of the geometric shapes.
If you want the diagonal green lines to stand out more clearly, repeat the sage-green accent strip in selected V units. Keep the green consistent throughout the quilt so that the design looks intentional.
For a more dramatic quilt, use burgundy as the dominant color and reserve cream and pale pink for narrow contrast strips. This creates stronger visual separation between the nested chevrons.
This design is excellent for using leftover floral cotton. Sort scraps by color family and cut them into 1 1/2-inch strips. Combine prints that share similar shades so the finished quilt looks coordinated rather than random.
The diagonal points do not meet.
Check that your strip sets were cut at a consistent angle and that you maintained a 1/4-inch seam allowance. Pin at the intersections before sewing.
The quilt top becomes wavy.
Avoid pulling the fabric while sewing. Press rather than stretch the seams, and check that all blocks have the same unfinished dimensions.
The green accent lines look uneven.
Make sure the green strips are cut to a consistent width and inserted straight into the strip sets.
The colors look too busy.
Add more ivory and pale pink between darker floral and burgundy areas. Repeating a few prints across the quilt will also help the design feel more unified.
The quilt is not square.
Measure the center and edges before trimming. Use a long ruler and trim gradually, taking care not to cut into important diagonal points.
A confident beginner can attempt the project, but it is easier if you have some experience with strip piecing, diagonal seams, and accurate quarter-inch seam allowances. Practice the V-shaped units on a small sample before starting the full quilt.
Yes. Add more blocks to the width or length, maintaining the same unfinished block size. If you enlarge the quilt, increase the backing, batting, and binding quantities accordingly.
Yes. Pre-cut 1 1/2-inch strips can be useful for this project. If you use 2 1/2-inch jelly-roll strips, you will need to adapt the block design and measurements to accommodate the wider strips.
Diagonal straight-line quilting is an excellent choice because it follows the chevrons and reinforces the diamond-like geometry. Stitch-in-the-ditch quilting is another good option if you want the patchwork itself to remain the main focus.
Absolutely. Try blue and cream for a coastal look, lavender and sage for a soft botanical quilt, or navy, burgundy, and ivory for a more traditional design.
This Romantic Rose Garden Chevron Quilt combines the charm of floral cottons with the structure of geometric patchwork. The pink and burgundy V shapes provide contrast, while the sage-green accents bring the entire design together.
Take your time selecting fabrics, make a test strip set before cutting all your pieces, and arrange the blocks carefully before sewing the rows. These small steps will help you create a quilt that looks balanced and beautifully finished.
Have you made a chevron quilt or a floral patchwork project? Leave a comment sharing your favorite fabric combinations, quilting technique, or tips for matching diagonal points. We would love to hear how you personalize this design!