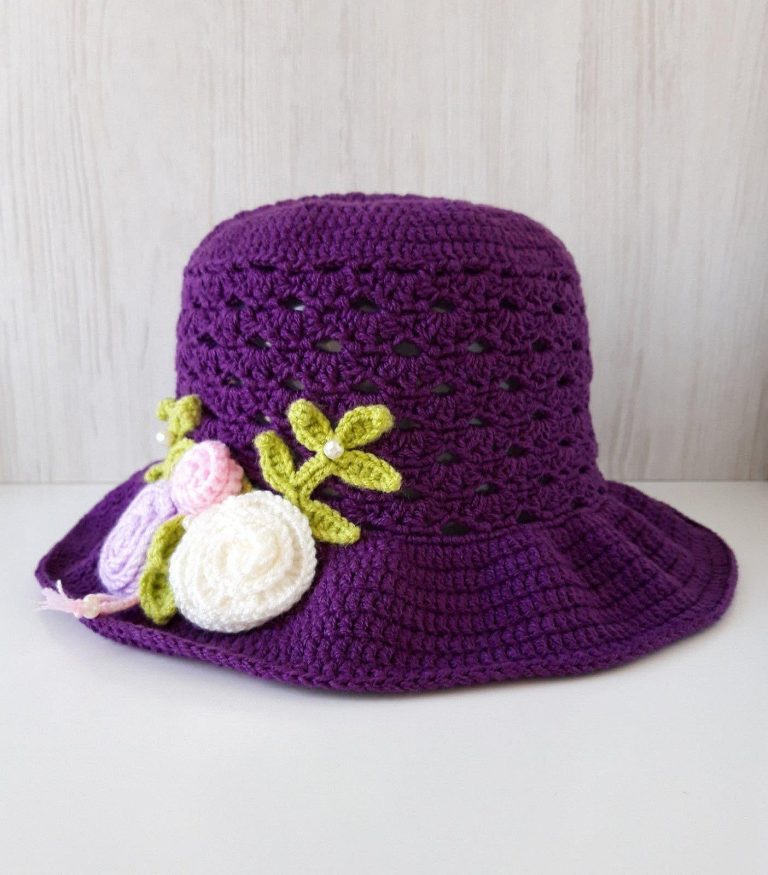
These beautiful crochet hats feature a rounded crown, an openwork stitch pattern, a gently flared brim, and decorative crochet flowers with leaves, wooden buttons, and braided cord. Below is an English-language tutorial inspired by the hats in your reference image.
This pattern is an original, approximate reconstruction based on the photograph, not a verified pattern for the exact hats shown. It uses US crochet terminology and is designed for an adult-size hat.
advertising
Materials
Worsted-weight cotton yarn (Category 4) in your chosen main color
Small amounts of yarn in cream, mustard, burgundy, pink, and green for flowers and leaves
4.0 mm crochet hook (or a size that gives a firm fabric)
2.5–3.5 mm crochet hook for small decorative flowers, if needed
Wooden button, approximately 20–25 mm
Cotton cord or braided yarn for the hatband
Yarn needle, scissors, stitch markers, and measuring tape
Skill level: Intermediate beginner
Finished size: Approximately 22–23 inches (56–58 cm) in head circumference. Adjust the crown and brim to fit.
The brim is worked outward from the bottom of the hat body.
Round 1: Ch 2, work 1 dc in every stitch and chain space around. Join.
Round 2: Ch 2, work 5 dc, then 2 dc in the next stitch. Repeat around. Join.
Round 3: Ch 2, work 1 dc in every stitch around. Join.
Round 4: Ch 2, work 6 dc, then 2 dc in the next stitch. Repeat around. Join.
Rounds 5–7: Work 1 dc in each stitch around, without increasing, to create a gently structured brim.
Continue adding rounds until the brim measures approximately 2.5–3 inches (6–7.5 cm) wide.
For a more dramatic, flared brim like the purple and teal hats, add another increase round. For a softer, closer-fitting brim, work fewer increases.
Finish with one round of sc around the edge. Fasten off and weave in the ends.
Step 4: Make the crochet flowers
8
Make flowers in different sizes and colors to recreate the floral clusters shown in the image.
Small five-petal flower
Make a magic ring.
Round 1: Ch 1, work 10 sc into the ring. Join with a sl st.
Petal 1: Sl st into the next stitch, ch 2, work 3 dc into the same stitch, ch 2, sl st into the same stitch.
Repeat the petal instructions in each of the remaining stitches to create five petals.
Pull the magic ring closed, fasten off, and weave in the ends.
For larger flowers, use more stitches per petal or taller stitches. Add a contrasting center with a small embroidered knot or a few stitches in a different yarn color.
Make approximately 3–5 flowers per hat in a combination of cream, mustard, burgundy, pink, or other coordinating colors.
Lay the hat flat and arrange the flowers along one side of the brim and lower crown.
Place the largest cream flower near the center of the arrangement.
Add smaller flowers in complementary colors around it.
Position the leaves behind the flowers, pointing in different directions.
Sew each flower and leaf securely to the hat using a yarn needle.
Hide all yarn tails inside the stitches.
Keep the flowers clustered on one side rather than evenly distributed around the entire hat. This creates the asymmetrical, handmade look shown in the photograph.
Step 8: Finish and shape the hat
Weave in all remaining ends.
Check that the button, cord, flowers, and leaves are firmly attached.
Gently shape the brim with your hands.
If needed, lightly dampen the hat and allow it to dry flat over a suitable form. Avoid stretching the crown.