Crochet Floral Summer Dress Pattern Outline

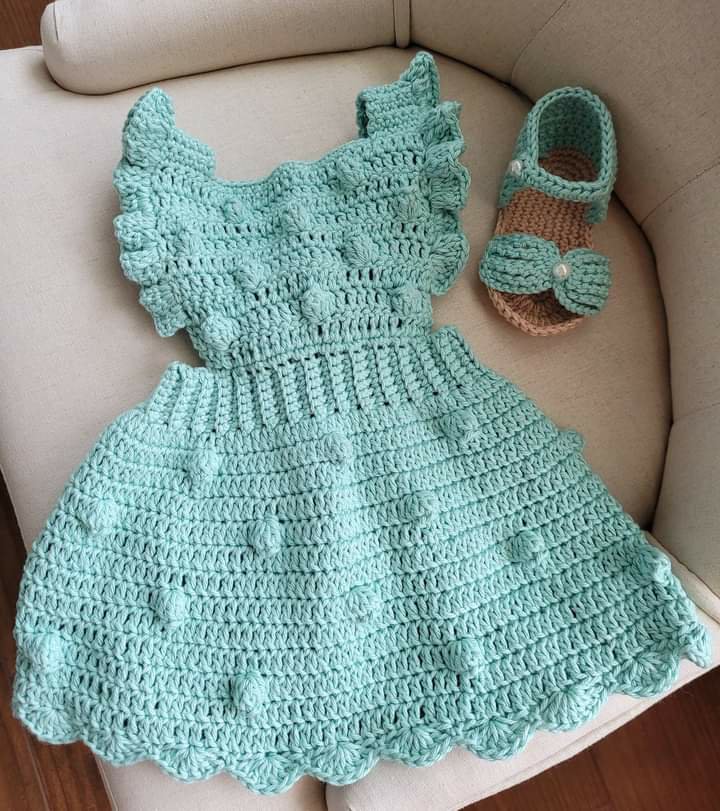
Crochet Bobble Baby Top, an easy piece to make and the result is stylish and charming and that will surely leave your little one beautiful and prepared to go on walks with Mom for any event, which is great and what we hope . In addition, of course, it could be another product to be added to your sales, as it will undoubtedly be in great demand, which will help you a lot. The material is also simple and the little girls will be so cute with this dress that can be made by mom or grandma, delighting everyone.
Following the step-by-step instructions very well explained here, it is possible to make this beautiful crochet piece that will delight everyone for its beauty. And always what counts is the creativity to create new pieces using techniques and recipes, expanding the products also for sale, increasing the monthly income, pleasing your customers who will surely love this piece.
Thank you for visiting our website. We always try to bring you the best. We hope you enjoyed the article we brought you today!! A beautiful little Baby Top and with a very well explained step by step here in the tutorial, it will be very easy to make this amazing little dress!
See Also:
➽ Crochet Strawberry Bag
➽ Crochet Motif Gown
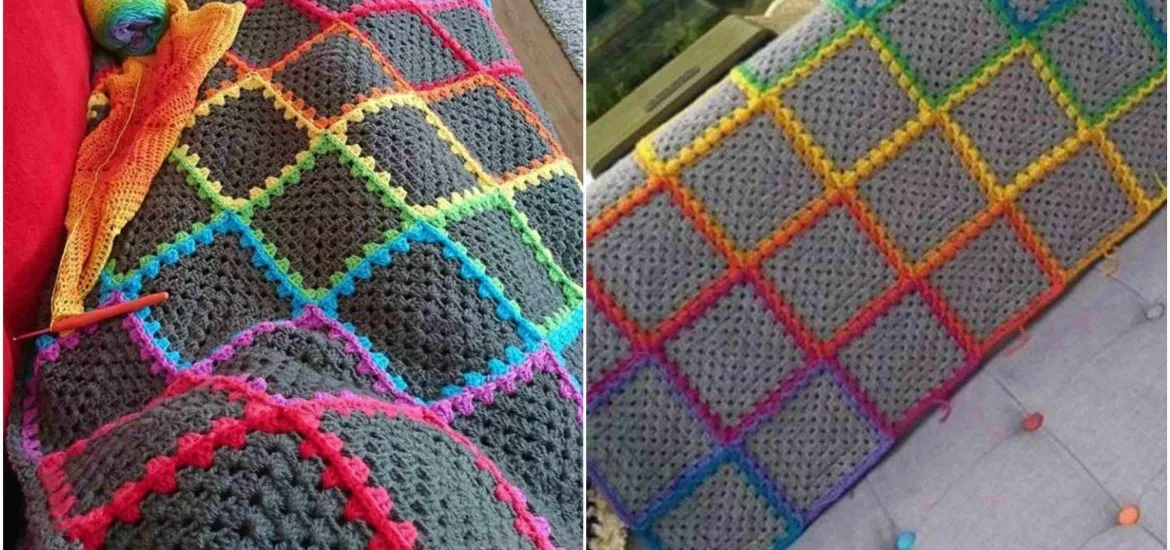
➽ Granny Square Blanket
MATERIALS
Yarn : Basket Yarn – Green (light worsted, need a little more than one skein)
Utopia Classic Light green (or can be any yarn in same category with main one)
Crochet hook: 4.5 mm and 5 mm Crochet Hooks
4 Buttons
Yarn Needle
Scissors
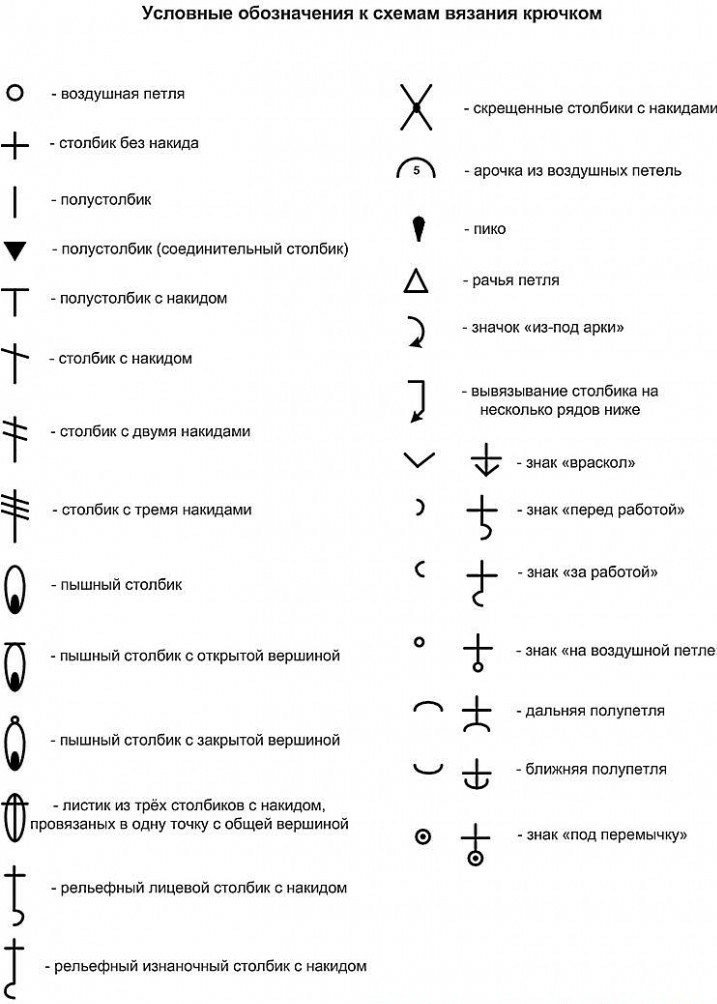
ABBREVIATIONS
ch = Chain
st(s) = Stitch(es)
sl st = Slip Stitch
yo = Yarn Over
sc = Single Crochet
fpsc = Front Post Single Crochet
dc = Double Crochet
bo = Bobble
yo, insert hook into st, yo and pull through (3 loops on hook), yo and pull through 2 of the loops. don’t pull through the last 2 loops. repeat this 4 more times in the same st, at the end you’ll have five uncompleted dc sts and 6 loops on the hook. finally, yo and pull through all six loops.
PATTERN 1


PATTERN 2
YOKE
foundation: ch 55 measures 31cm (multiples of 3 + 1)
*work row 1 in back bump of the chain base.
ROW 1: sc in the 2nd ch from hook, sc in each st across, turn.
ROW 2: ch 2, *dc 2, 2dc in same st, repeat from * until end, turn.
ROW 3: ch 1, sc in each st across, turn.
ROW 4: ch 2, *dc 3, 2dc in same st, repeat from * until end, turn.
ROW 5: ch 1, sc in each st across, turn.
ROW 6: ch 2, *dc 4, 2dc in same st, repeat from * until end, turn.
ROW 7: ch 1, sc in each st across, turn.
ROW 8: ch 2, *dc 5, 2dc in same st, repeat from * until end, turn.
ROW 9: ch 1, sc in each st across, turn.
*join for the armholes in row 10. this is where you could add rows if you want to make it bigger, before you join the armholes.
BODY (joining armhole)
armhole separation: count 18 sts and place st markers into 18th sts on both front sides. leave 27 sts for each armhole and 36 sts for the back.
*for each bobble st placement, we will need 8 sts in total. there are 72 sts in total after armhole sts subtracted. (126-27-27=72) we’ll leave 2 sts for each front edge, 4 in total(not going to be used for bobble st placement). we also need more sts for the armpits. since we need multiples of 8, we can add 8 more sts. so, for each armhole separation, we need: 4+8 = 12, 12/2 = 6 chains.
ROW 10: ch 2, dc 18, ch 6, sk 27 sts, dc 36, ch 6, sk 27 sts, dc 18, turn.
ROW 11: ch 1, sc 2, *bo, sc7, repeat from * until 4 sts left, 2sc in same st (to complete 7 sts before the last bo), bo, sc 2, turn.
ROW 12: ch 2, dc in each st across, turn.
ROW 13: ch 1, sc 6, *bo, sc 7, repeat from * until 7 sts left, bo, sc 6, turn.
ROW 14: ch 2, dc in each st across, turn.
ROW 15: ch 1, sc 2, *bo, sc 7, repeat from * until 3 sts left, bo, sc2, turn.
ROWS 16-28: repeat rows 11-14. (measures 27 cm in total)
Bottom Border
ROW 29: ch 1, sc in each st across, turn.
ROWS 30-32: repeat row 28.
Left Front Edge Border
continue from bottom,
first row: ch 1, sc 1 in each row space all the way up, turn.
second row(work for button holes): ch 1, sc 2, ch 2, sk 2, sc 6, ch 2, sk 2, sc 6, ch 2, sk 2, sc 8, ch 2, sk 2, sc 2, turn.
third row: ch 1, sc in each st across with 2 sc for chain spaces. Fasten off.
Right Front Edge Border
insert your hook in the bottom corner st, ch 1, sc in the same st, and sc in each st across, turn. complete the border in 3 rows as above but without button holes.
SLEEVES
there are 27+2+6=35 sts in total for armhole. but we need multiples of 8 for bobble stitch placement, so we are gonna drop this 32 sts by skipping 3 sts in total.
start from the middle of armpit in clockwise direction.
ROW 1: ch 2, dc in same st, sk 1, dc, aro
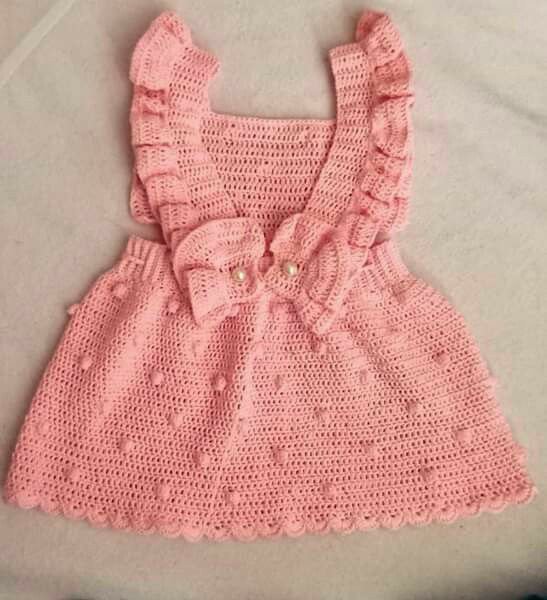
Crochet Bobble Baby Top, a stylish and beautiful baby Top that I’m sure you’ll love, this amazing piece can give your little one a beautiful look that’ll amaze everybody, believe me. This beautiful TopTop is very stylish and its colors can be changed if you want to match the baby’s wardrobe, this will surely make your customers want one like it, which will help you in sales!!
Want to make this amazing Crochet Bobble Baby Top? Then set aside all your material and tools before starting your piece so that you already have everything close at hand, this way it’ll be easy to carry out this project, follow the tutorial carefully, make your piece while following the tutorial and I’ m sure that you will be able to make this amazing work easily.