Vintage Hexagon Flower Quilt Tutorial

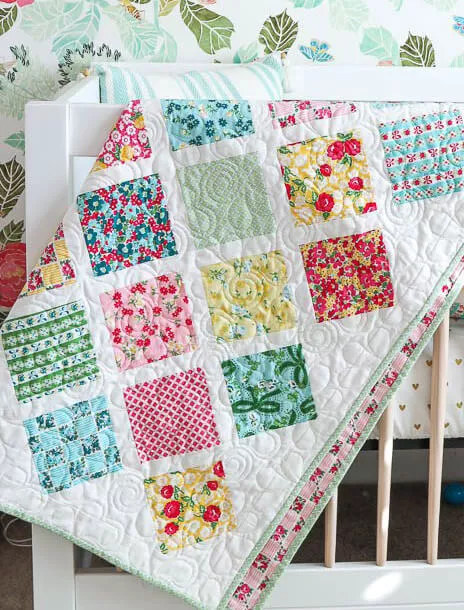
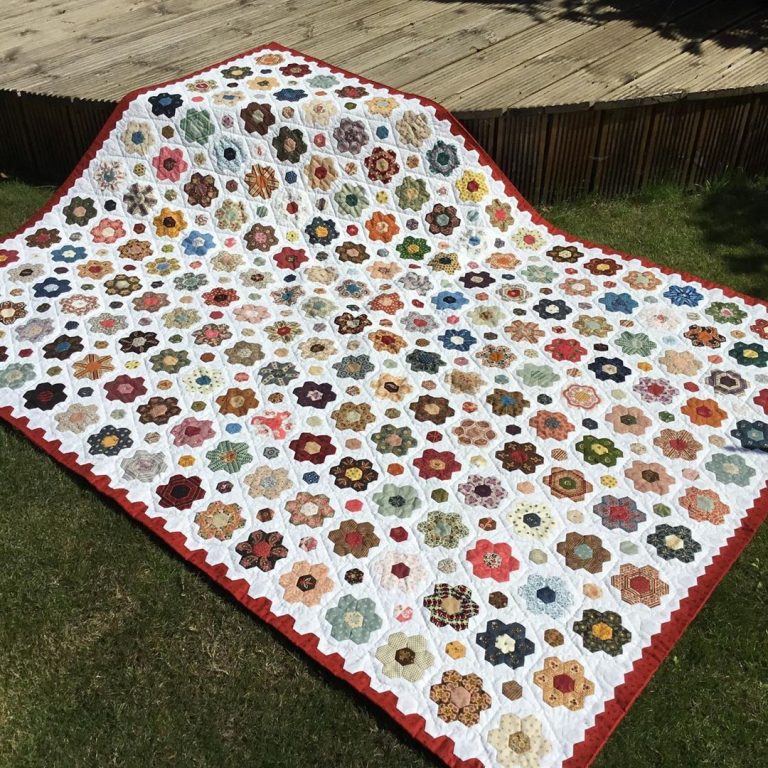
Create a beautiful vintage-inspired hexagon flower quilt using colorful fabric scraps and a soft white background. This stunning patchwork design features hundreds of small floral blocks arranged across the quilt, with a traditional red binding that frames the finished piece.
The quilt shown in the photograph combines charming floral prints, muted vintage colors, and delicate geometric shapes. Each flower is made from small fabric pieces arranged around a central hexagon, creating a garden-like effect across the entire quilt.
This style of quilt is perfect for quilters who love traditional patchwork, English Paper Piecing (EPP), and projects that make beautiful use of fabric scraps. Although the finished quilt looks intricate, the individual flower units are small and repetitive, making them manageable to work on one at a time.
In this tutorial, you will learn how to choose fabrics, prepare hexagon templates, create flower motifs, arrange the blocks, assemble the quilt top, and finish the edges with binding.
Please note: This tutorial is inspired by the photograph. The exact original pattern, hexagon dimensions, and total number of flowers are unknown, so the measurements provided are suggested starting points rather than verified specifications for the pictured quilt.
Before beginning, gather the following materials:
Cotton quilting fabric is the best choice because it is easy to handle and provides consistent results when working with small shapes.
One of the most appealing features of this quilt is its variety of colors and patterns.
The flowers include muted red, rust, mustard, brown, navy, dusty blue, sage green, pale pink, and cream. Many fabrics have small-scale prints that create visual interest without overwhelming the overall design.
Choose a wide selection of fabrics rather than using only a few prints. Small floral patterns, dots, tiny leaves, geometric prints, and traditional quilting designs all work well.
You do not need to purchase new fabric for every flower. This project is ideal for using leftover cotton pieces from previous quilting projects.
Each flower has a small center hexagon that contrasts with the surrounding petals.
Try using a dark center with lighter petals, a mustard center with blue petals, or a red center surrounded by cream and brown prints.
Vary the combinations to make each flower unique.
The white background provides space between the flowers and allows the colorful motifs to stand out.
Use a white, ivory, or very pale cream fabric. A subtle tone-on-tone print is also suitable, provided it does not compete with the flower designs.
The original quilt has a rich red border that frames the entire design.
Choose a deep red, brick red, or muted burgundy fabric to achieve a similar finish.
Before cutting your fabrics, decide how large you want each flower to be.
A practical option is to use small hexagons with sides measuring approximately ¾ inch. This creates delicate flowers similar in scale to the motifs shown in the photograph.
For a simpler project, use hexagons with sides measuring 1 inch. Larger shapes are easier to sew, although they will produce a bolder floral design.
Remember that the finished flower size depends on the size of the center hexagon, the surrounding petal hexagons, and the way the flowers are arranged.
For your first sample, make one complete flower before cutting large quantities of fabric.
English Paper Piecing uses paper templates to help maintain precise shapes while the fabric is sewn together.
You can purchase pre-cut hexagon papers or make your own.
For a flower made from one center hexagon and six surrounding hexagons, you will need seven hexagons per flower.
If your design includes additional decorative pieces, prepare those templates separately.
Tip: Lightweight cardstock works well because it is sturdy enough to hold its shape but can still be removed after the fabric pieces are sewn together.
Place your hexagon templates on the wrong side of your selected fabrics.
Trace around each template, adding approximately ¼ inch of fabric beyond every paper edge for the seam allowance.
Cut out the fabric pieces carefully.
For each flower, prepare:
Choose fabrics that contrast enough to make the flower shape visible.
For example, you could use a dark red center with six cream floral petals, or a mustard center with blue and green petals.
Make several different combinations rather than repeating the same colors throughout the quilt.
This step prepares each fabric piece for English Paper Piecing.
Place a paper hexagon in the center of the fabric piece, with the wrong side of the fabric facing upward.
Fold the fabric edges over the paper template, one side at a time.
Secure the folded edges using your preferred basting method. You can use temporary stitches through the fabric seam allowance, or a suitable fabric-safe glue pen.
Make sure the fabric is folded neatly around every corner.
Repeat the process for all your hexagons.
Keep the pieces organized by flower so you can assemble them without mixing up your color combinations.
Now you can begin creating the individual flowers.
Place one center hexagon in the middle and arrange six petal hexagons around it.
The six petals should form a ring around the center, with one full edge of each petal touching an edge of the center hexagon.
Use small, secure hand stitches to join the fabric edges together.
For English Paper Piecing, place two pieces right sides together and whipstitch along the folded edges, taking care not to stitch through the paper.
Continue until all six petals are attached to the center.
You should now have a small flower made from seven hexagons.
Repeat this process to create as many flowers as your quilt requires.
To recreate the variety in the photograph, try combinations such as:
Mixing different fabrics creates the vintage charm of the finished quilt.
Once all the seams around a flower are secure, carefully remove the paper templates.
If you used temporary basting stitches, remove them as needed without cutting the permanent joining stitches.
If you used glue, gently release the paper according to the product instructions.
Press the flower lightly with an iron suitable for your fabric.
Be careful not to stretch the hexagon edges.
Check that the flower lies flat and that the center remains clearly defined.
Repeat this process for every flower.
Before joining the flowers into a quilt top, lay them out on a large flat surface.
Arrange the flowers in rows, alternating the colors and prints.
Avoid placing too many dark flowers together in one area. Spread the darker colors throughout the design to create a balanced appearance.
The photograph shows flowers in many different sizes and color combinations, but they share a consistent overall shape.
You can recreate this effect by keeping the hexagon size consistent while changing the fabric combinations.
Leave enough space between the flower motifs for the white background fabric.
Take a photograph of your layout before sewing the pieces together. This will help you remember the arrangement if you need to move the flowers.
The white background is an important part of this quilt’s design.
There are several ways to construct it, depending on your preferred technique.
Cut white fabric pieces to fit around the edges of the hexagon flowers.
Sew the background pieces to the flower units, carefully matching the edges.
This method creates individual flower blocks that can be assembled into rows.
If you are experienced with English Paper Piecing, you can use additional white hexagons or other shaped background pieces to connect the flowers.
This approach can create a more continuous patchwork surface.
For a simpler construction method, make the flowers using English Paper Piecing, remove the papers, and appliqué the finished flowers onto a white background panel.
This method is often easier for quilters who want a similar visual effect without assembling every background section from small pieces.
Whichever method you choose, maintain consistent spacing between the flowers.
Once your flowers and background pieces are prepared, begin assembling the quilt top.
Work with one row at a time.
Place the first two flower units together, matching the edges of their connecting background pieces.
Sew them together using the seam allowance appropriate to your construction method.
Continue joining the units until the row reaches your desired width.
Repeat for the remaining rows.
Lay the rows together before sewing them to check that the flowers align and the background spacing remains consistent.
Press the seams carefully as you go.
For a large quilt, working in manageable sections helps prevent the fabric from becoming tangled or stretched.
When all the rows are complete, join them to create the full quilt top.
Align the edges of the rows and pin them together at important intersections.
Sew each row to the next, maintaining a consistent seam allowance.
Press the seams after each row is attached.
Once the entire quilt top is assembled, lay it flat and inspect the overall arrangement.
Check that the flowers are evenly distributed and that the background fabric creates a consistent visual rhythm.
Trim uneven edges carefully, leaving enough fabric for the intended finished size.
The red binding in the photograph creates a strong frame around the white background and colorful flowers.
Before attaching the binding, make sure the quilt top has straight edges and square corners, unless you are deliberately creating a shaped edge.
For a conventional rectangular quilt, cut red binding strips approximately 2½ inches wide.
Join the strips together diagonally to create one long strip.
Press the strip in half lengthwise, with the wrong sides together.
Align the raw edges of the binding with the raw edge of the quilt top.
Sew the binding around the perimeter using a ¼-inch seam allowance, carefully mitering the corners.
Fold the binding over to the back and stitch it in place by hand or machine.
If you prefer a wider red frame like the one visible in the photograph, add a separate red border to the quilt top before quilting and binding.
To turn your patchwork top into a finished quilt, prepare three layers:
Cut the batting and backing fabric slightly larger than the quilt top.
Lay the backing fabric on a flat surface with the wrong side facing upward.
Place the batting on top, smoothing out any wrinkles.
Position the quilt top over the batting, with the right side facing upward.
Smooth all three layers carefully.
Secure the layers with safety pins, temporary basting spray, or hand-basting stitches.
Make sure the layers remain flat and that the flower motifs are not distorted.
Quilting stitches hold the layers together and add texture to the finished piece.
For this design, simple quilting is often the best choice because the flower motifs are already detailed.
You can stitch around the outlines of the flowers, follow the edges of the background shapes, or use gentle straight-line quilting through the white spaces.
Choose a quilting thread that blends into the background.
If you prefer a more decorative finish, use small floral quilting motifs in the white areas.
Avoid stitching too densely through the small flower centers, as excessive quilting can obscure their details.
When machine quilting, support the weight of the quilt and work slowly to avoid puckering.
After quilting, place the quilt on your cutting mat.
Trim the excess batting and backing fabric, keeping the edges straight.
Measure the quilt and check that the corners are square.
If the quilt is intended to have a red binding, make sure the raw edges are even before attaching it.
Inspect the quilt top for loose threads and secure any seams that may have opened during quilting.
The final red binding completes the vintage appearance of the quilt.
Sew the prepared binding strip around the perimeter of the quilt, using a consistent seam allowance.
At each corner, fold the binding diagonally to create a neat miter.
When you reach the starting point, join the ends of the binding neatly and finish sewing.
Fold the binding over the raw edges to the back of the quilt and stitch it in place.
You can finish the binding by hand for a traditional appearance or use a machine stitch if you prefer a quicker method.
Press the finished edges gently.
Your hexagon flower quilt is now ready to display or use.
English Paper Piecing is a hand-sewing technique in which fabric is wrapped around paper templates. The prepared pieces are then sewn together along their folded edges to create precise geometric patchwork.
The individual flowers are manageable for beginners who are comfortable with hand sewing. However, assembling a large quilt with many small motifs requires patience and careful planning.
Yes. This is an excellent scrap quilt project. Small pieces of cotton fabric can be used for the flower centers and petals.
The number depends on the finished quilt size, the size of each flower, and the amount of white background between the motifs. Make several sample flowers and arrange them before deciding how many to prepare.
Yes. You can use machine piecing or appliqué for parts of the construction. English Paper Piecing is traditionally hand-sewn, but the overall design can be adapted to your preferred method.
White or ivory quilting cotton works well because it highlights the colorful flowers and creates a clean, traditional appearance.
Absolutely. Red creates a classic vintage look, while navy, dark green, burgundy, or charcoal can give the quilt a different character.
This vintage hexagon flower quilt is a beautiful way to celebrate traditional patchwork and make use of a treasured fabric collection.
Each flower can be different, allowing you to experiment with colors and prints while maintaining a cohesive overall design. The light background keeps the quilt fresh and balanced, while the red binding creates a warm, classic finish.
Although the project involves many small pieces, working on one flower at a time makes it easier to manage. Enjoy the process, experiment with your favorite fabrics, and let each flower contribute to the character of your finished quilt.
Happy quilting!