Granny Square Crochet Poncho

Create a cozy and stylish DIY crochet wrap shawl with this easy-to-follow tutorial. This oversized handmade piece combines a simple rectangular construction with chunky crochet stitches, making it a wonderful project for crocheters who want to create a warm and comfortable garment without complicated shaping.
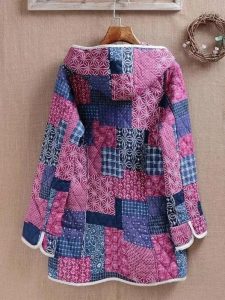
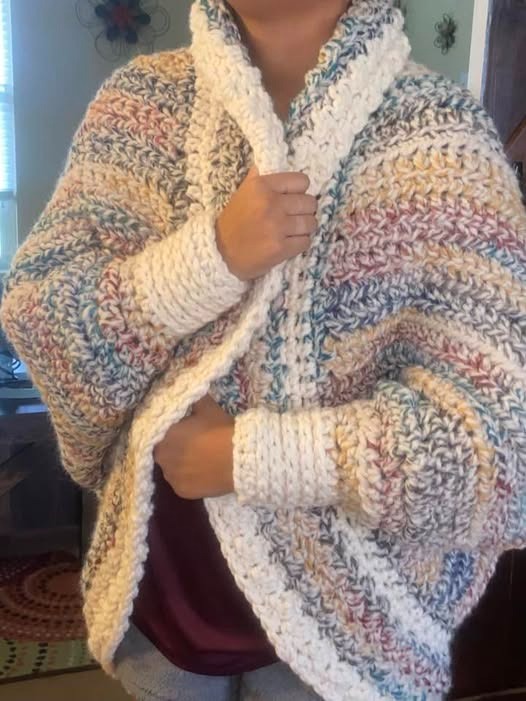
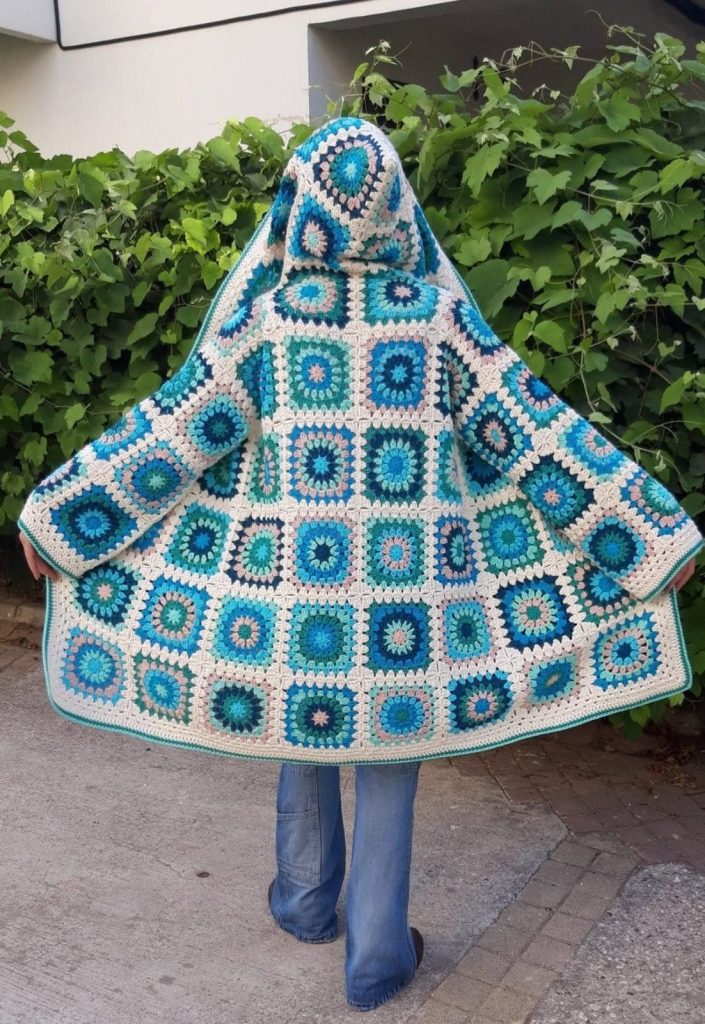
The design shown in the inspiration image has a beautiful oversized poncho-style silhouette, wide sleeves, a large cozy collar, and a soft multicolored texture. The neutral cream yarn mixed with pastel shades gives it a warm, rustic appearance that works beautifully for fall and winter outfits.
This is also a great project for beginners because the main body can be constructed from simple rectangular crochet panels.
Before beginning your project, gather all your supplies.
Choose a medium-to-bulky weight yarn depending on how warm and heavy you want the finished wrap to be.
Good choices include:
For a look similar to the inspiration piece, choose a yarn with cream, beige, dusty pink, blue, gray, and muted yellow tones.
You can also combine several solid colors to create your own striped design.
A larger crochet hook can create a softer, more flexible fabric, while a smaller hook produces a denser and warmer fabric.
Before you start crocheting, decide how oversized you want your wrap to be.
The design shown is intentionally loose and roomy.
Possible finished sizes include:
Approximately 120–130 cm wide.
Approximately 140–150 cm wide.
Approximately 160–180 cm wide.
Approximately 180–200 cm wide or more.
The length can also be adjusted depending on whether you want the garment to sit around the waist, hips, or lower thighs.
Tip: If you want a dramatic oversized look similar to the inspiration photo, make the main rectangle wider than your normal shoulder-to-shoulder measurement.
Before crocheting the entire garment, make a small gauge swatch.
Crochet approximately:
15 × 15 cm
using the stitch you plan to use for the project.
Measure how many stitches and rows you get within 10 cm.
Gauge isn’t extremely critical for an oversized wrap, but it is useful if you want the finished piece to have a specific size.
If your fabric is too stiff, try a larger hook.
If it is too loose, use a smaller hook.
The inspiration piece has a textured appearance with rows that create a soft, slightly ridged surface.
You can recreate this look using a simple textured stitch.
Good options include:
For a beginner-friendly version, half double crochet is an excellent choice.
It works up quickly and creates a cozy fabric without being overly complicated.
Begin with a foundation chain long enough to create the desired width of the main body.
For example, if your gauge produces approximately 12 stitches per 10 cm, you would need roughly 180 stitches for a 150 cm wide piece.
The exact number will depend on:
Always use your measurements rather than copying an exact stitch count.
Work your chosen stitch across the foundation chain.
For a simple half-double crochet design:
Repeat across the row.
At the end of the row, chain one or two stitches according to the stitch you’re using and turn.
Continue crocheting row after row.
The main body should remain rectangular.
This is one of the easiest aspects of the design because you don’t need complicated increases or decreases.
Keep crocheting until the piece reaches your desired length.
For a wrap that falls around the hips, you may want approximately:
65–80 cm of length.
For a longer, more dramatic garment, increase the length to approximately:
80–100 cm.
The inspiration piece has a beautiful variegated appearance.
If you’re using multicolored yarn, simply continue crocheting and allow the colors to change naturally.
If you’re using several solid colors, create horizontal stripes.
For example:
Repeat or rearrange the colors according to your preference.
You can also make the color changes irregular to create a more handmade, artistic appearance.
As you crochet, occasionally lay the piece flat.
Check that the side edges remain straight.
Count your stitches at the end of every few rows.
If you accidentally skip or add a stitch, the rectangle can gradually become wider or narrower.
A stitch marker at the first and last stitch can help prevent mistakes.
Once the main rectangle reaches the desired size, finish the final row.
Cut the yarn, leaving a tail of approximately 15–20 cm.
Pull the yarn through the final loop.
Tighten gently.
Use a yarn needle to weave the loose end into the back of the work.
The wrap is created by folding the large rectangular piece around the body.
Place the rectangle flat.
Fold it according to your desired construction.
The center can remain open to create the front opening.
The sides can then be partially joined to form the sleeves.
Before sewing anything permanently, try the piece on or place it around your shoulders.
This allows you to determine exactly where you want the sleeve openings.
Fold the garment so that the front and back sections line up.
Starting near the bottom edge, join part of the side seam.
Leave enough space near the top for the arm opening.
The amount you sew determines the width and length of your sleeves.
For a loose, oversized sleeve, leave a larger opening.
For a more fitted sleeve, sew the side seam higher.
The inspiration garment has wide, cozy sleeves.
You can create the sleeves simply by continuing the side seams upward.
The sleeve openings should be large enough to allow comfortable arm movement.
Try the garment on before completing the seams.
Move your arms forward, backward, and upward to make sure the sleeve isn’t restrictive.
The sleeves in the inspiration piece have wide cream-colored cuffs.
To recreate this effect, crochet a separate cuff around the bottom of each sleeve.
You can use:
A cuff approximately 8–12 cm wide creates a cozy oversized appearance.
Attach your yarn around the bottom edge of the sleeve.
Work several rounds of your chosen stitch.
For a ribbed cuff, you can work half double crochet in the back loop only.
Continue until the cuff reaches your desired length.
Fasten off and weave in the ends.
Repeat on the other sleeve.
One of the most distinctive features of this garment is the large cozy collar.
The collar frames the neck and gives the wrap a structured appearance.
You can crochet the collar directly around the neckline.
Attach the yarn near the center back.
Work rounds or rows around the neckline.
For a large collar, work several rows of half double crochet.
Increase slightly at the corners if necessary so that the collar lays flat.
Continue until the collar reaches approximately:
10–15 cm wide.
For an extra dramatic collar, make it 15–20 cm wide.
Try the garment on as you work to determine how much coverage you prefer.
The inspiration piece uses a light cream collar that contrasts beautifully with the multicolored body.
This is a simple way to make your crochet garment look more sophisticated.
Use:
A solid color works particularly well if your main yarn is variegated.
The front opening can be finished with a simple crochet border.
Work one or more rows around the entire front opening.
You can use:
A contrasting cream border will create a clean frame around the garment.
For an extra polished finish, add a second border.
You could use:
For a minimalist look, keep the border simple.
The inspiration garment is worn open and held together naturally around the body.
However, you can add a closure if you want.
Possible options include:
A large wooden button would complement the rustic appearance beautifully.
Once all sections are complete, inspect the garment for loose yarn tails.
Thread each end onto a yarn needle.
Weave the yarn through several stitches on the wrong side.
Change direction once or twice to secure it.
Trim the excess yarn.
Don’t simply cut the ends short, as they may unravel over time.
Blocking can make a huge difference to the final appearance.
Lightly dampen the crochet piece.
Lay it flat on a clean surface.
Gently stretch it into the correct shape.
Pay attention to:
Allow the garment to dry completely before moving it.
Try the finished wrap on.
Check:
Because this is an oversized design, it should feel comfortable rather than restrictive.
If the wrap is shorter than you expected, you can add additional rows to the bottom.
A contrasting border is an easy way to add extra length without changing the main body.
You can also add several rows of cream yarn to match the collar and cuffs.
This creates a coordinated finished design.
A crochet belt is an optional addition.
Make a long narrow strip using the same yarn.
You can crochet:
Tie the belt around the waist to create a more fitted silhouette.
This allows the same garment to be worn either loose or belted.
The best yarn depends on the season.
Choose:
Choose:
Acrylic yarn is affordable, easy to work with, and available in many colors.
The multicolored yarn in the inspiration image creates a soft vintage appearance, but you can customize the colors.
Use:
Try:
Combine:
Use:
Avoid crocheting too tightly.
A loose tension creates a garment that drapes beautifully around the body.
Lay the project flat every few rows.
Markers make it easier to identify the first and last stitch of each row.
The collar should sit comfortably around the neck without restricting movement.
This is especially important when creating the sleeves.
If you don’t want to construct sleeves separately, you can simplify the project even further.
Crochet one large rectangle.
Fold it in half.
Sew only a portion of each side, leaving openings for your arms.
Then add a border around the neckline.
This creates a simple crochet poncho wrap with almost no shaping.
It is one of the easiest ways to recreate the general silhouette shown in the inspiration photo.
This oversized crochet piece can be worn with many outfits.
Try it with:
The oversized shape works particularly well with simple clothing underneath.
This DIY crochet oversized wrap is a cozy and versatile project that combines simple construction with a beautiful textured finish. The large rectangular body means you don’t need complicated garment shaping, making it an excellent choice for crocheters who want to make their first wearable piece.
The oversized sleeves, wide cream cuffs, and large collar give the garment a warm, comfortable appearance, while the multicolored yarn creates a unique handmade texture.
You can follow the same basic construction using different yarn weights, colors, and stitch patterns to create completely different versions.
Whether you make it as a cozy winter wrap, a casual poncho, or an oversized crochet cardigan, this is a project you can customize to fit your style and measurements.