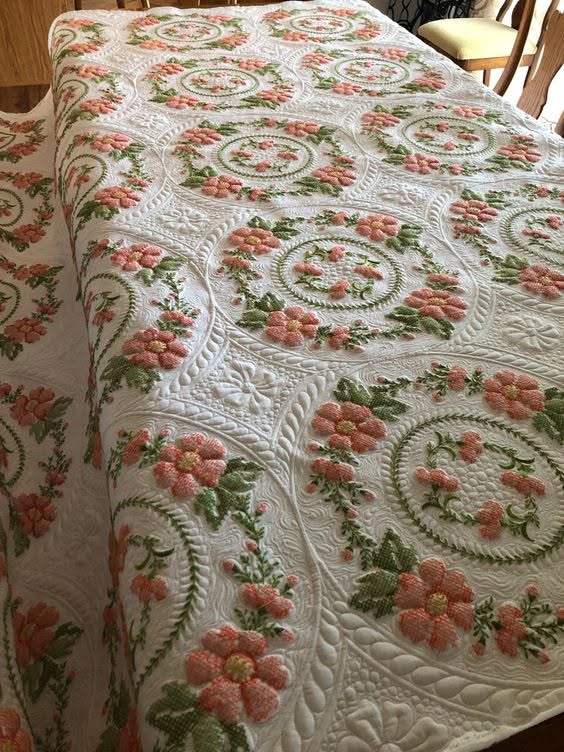
Rings of Posies

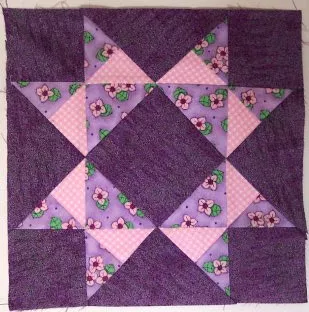
The Ohio Star Quilt block is another clasic pattern with an impressive history, incredible modern variations and some important tips from you truly.
Creating another post to take away the fear of the quilt pattern and the better it is free.This technique is wonderful, deserves respect and dignity, so come learn how to make Ohio Star quilt and enjoy to practice even more than you have difficulty.
We are here for this: to help you to have the best result in your work and to improve every day more. Make you move forward in your projects and be able to carry them out in the best way.
Padding can be a fun and rewarding hobby. Remembering that there is no right and wrong in the work done by hand, we are free to invent and do what is best and most beautiful. Particularly if you deal with free quilting!
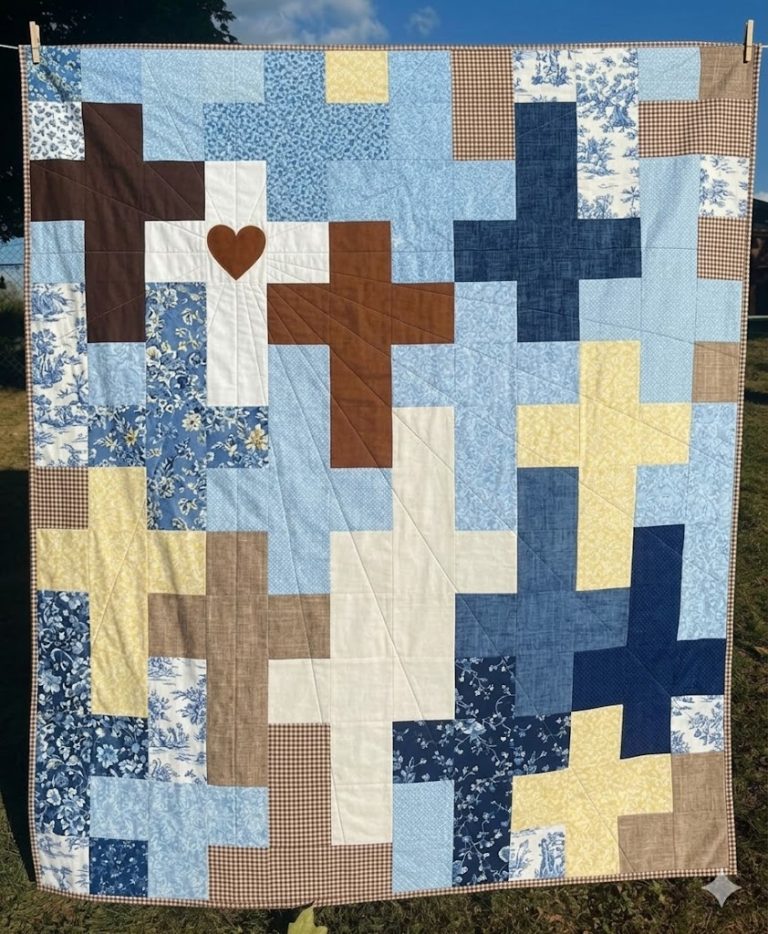
So to make this quilt, what you will need are three packages of five-inch squares. There are 42 squares per package. And you’re going to need three of those. And it’s a beautiful line. I mean, you take a look at the quilt behind us and it’s beautiful. You will also need six feet of background fabric. Now the bottom fabric will fill the pillars in your blocks. It will, you know, end on the other side of your hourglass. And also will be their tracks, all the tracks and the first border. So that’s going to come out of six meters. Now you will need at least 84 squares of these five-inch squares.
So two of them can be charm packs, which brings up to four feet of fabric that you will need. So I hope this is not too confusing. Six yards total or four yards, if you buy a couple of packs of charm as well. You will also need about 2 ½ yards to your border. This will do this, will make this border here and will make all your little cobblestones. We made all our little stones, our little pillars of the same color that, of course, you can mix if you want. But we use, we use all the same color we use for border fabric.
Now, without wasting any more time, let’s get right to the point and take advantage and train so that you can get better every day at work. We hope this tutorial has helped you and your project. Then tell us about your project. If you liked this project please share the site so that you can help other people. Until the next pattern!
Follow our Facebook page on Ck Crafts, and our Love Quilting group. We give weekly tips with free pattern. I see you there.
I leave available for you the standard ⇨ Free patterns ⇦
