Crochet Santa Claus Christmas Bracelet

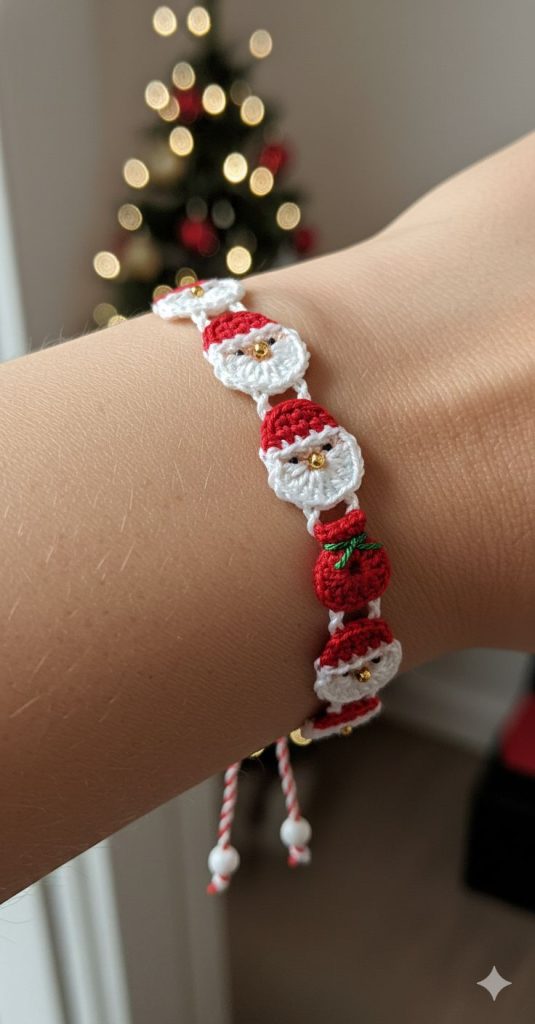
Create an adorable Christmas bracelet featuring tiny crochet Santa Claus faces, red Christmas ornaments, and adjustable braided cords. This festive handmade accessory is perfect for holiday gifts, Christmas markets, or adding a special touch to your seasonal outfit.
Using white thread, make a magic ring.
This creates the small circular base for Santa’s beard and face.
Using beige thread:
Sew this small circle onto the upper center of the white base, leaving the white stitches visible around it to create Santa’s beard.
Using red thread:
Sew the red piece onto the top of Santa’s face, shaping it slightly like a Christmas hat.
Using white thread, attach the yarn along the bottom edge of the red hat.
Work small SC stitches across the edge to create a fluffy white trim.
Add a tiny white pom-pom to the tip of the hat if desired.
Using small black or dark brown beads, sew two tiny eyes onto the beige section.
Add a small gold bead or a few stitches of golden thread for the nose.
Make sure all embellishments are securely attached.
Using red thread:
Use green embroidery thread to make a tiny bow or decorative leaves at the top of the ornament.
Repeat the Santa face and Christmas ornament instructions until you have enough pieces for your desired bracelet length.
Alternate Santa faces and red ornaments to create a festive pattern.
Using white thread, make small chains between the motifs.
Attach each motif securely, leaving a short chain between each one.
Arrange the pieces so that the bracelet forms a flexible strip that comfortably wraps around the wrist.
Attach red and white thread to both ends of the bracelet.
Braid or crochet two long cords, approximately 3–4 inches each.
Add a small white bead to the end of each cord and secure with a knot.
Tie the cords together using an adjustable sliding knot so the bracelet can fit different wrist sizes.
Carefully weave in all loose ends and check that every motif is firmly attached.
Adjust the Santa hats, beards, and Christmas ornaments to make sure they are evenly positioned.
Your cute Santa Claus Christmas bracelet is now ready to wear or give as a handmade holiday gift!
Helpful Tip: Use thin cotton crochet thread and a small hook to achieve delicate, detailed motifs like those in the inspiration photo. Keep the stitches tight and consistent for a neat finish.