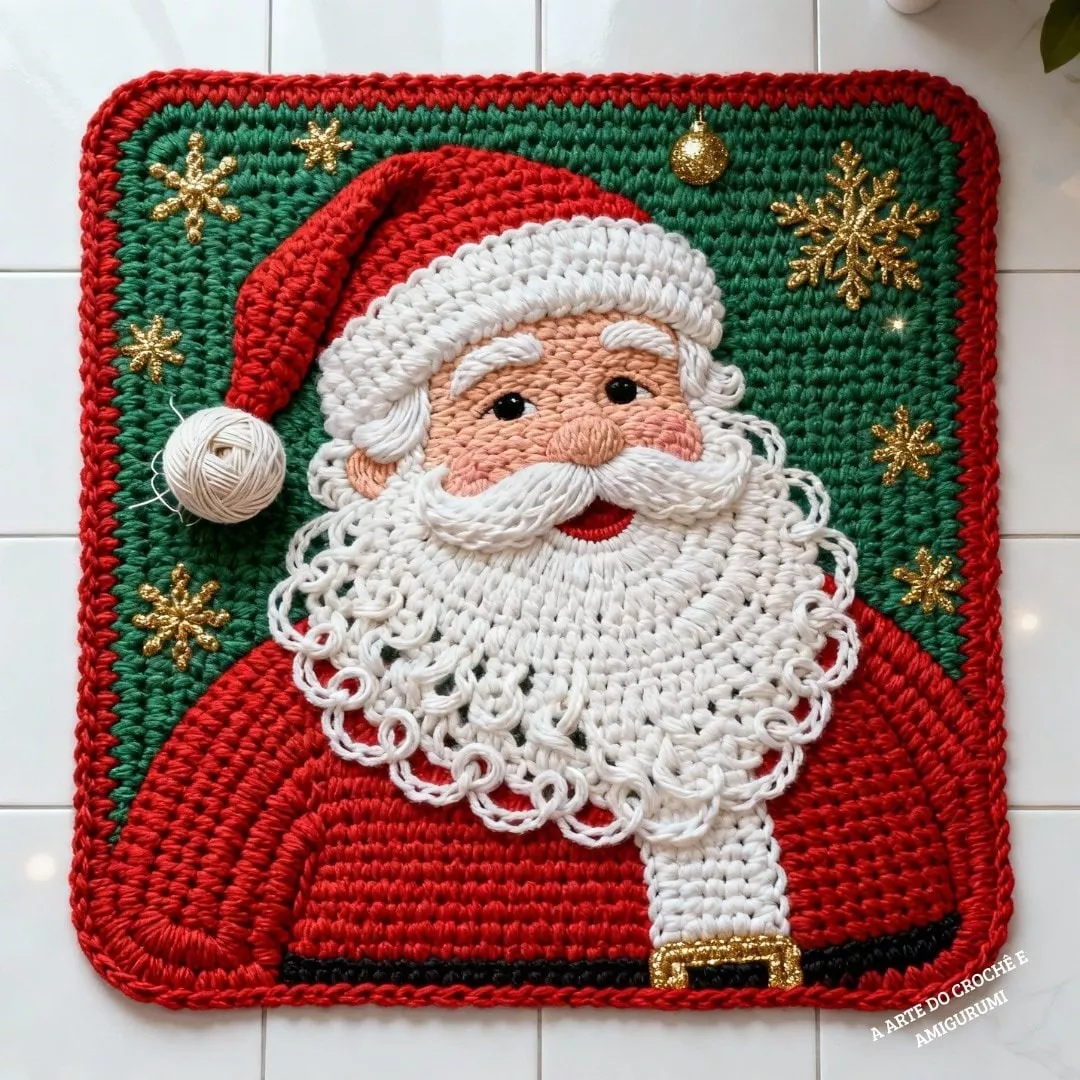
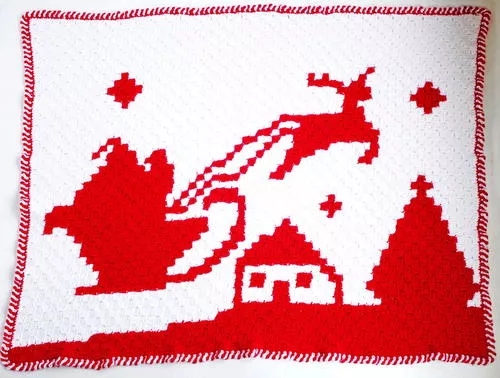
Crochet Santa Claus Square Pattern
This pattern creates a detailed Santa Claus portrait square, perfect for a wall hanging, pillow front, or large blanket square. The main design uses the Tapestry Crochet technique for colorwork, and dimensional stitches for the beard and border.
- Skill Level: Intermediate to Advanced (Due to color changes and texture).
- Finished Size: Varies (Approx. 12 x 12 inches / 30 x 30 cm using worsted weight yarn).
- Gauge: Not critical, but stitches must be tight for clean color changes.
Materials
- Yarn (Worsted Weight / Category 4):
- R (Red): For Santa’s body and hat.
- G (Green): For the background.
- W (White): For the beard, hat trim, and scarf.
- S (Skin Tone/Peach): For Santa’s face.
- B (Black): Small amount for belt or facial details.
- Y (Yellow/Gold): Small amount for buckle.
- Hook: US G/6 (4.0 mm) or H/8 (5.0 mm), depending on desired tension.
- Other: Tapestry Needle, Scissors, Optional: Gold/Glitter yarn for snowflakes, small gold bead for a final touch.
Abbreviations (US Terms)
General Instructions (The Tapestry Foundation)
- The main square is worked in SC (Single Crochet) rows, turning at the end of each row.
- You must carry the colors you are not using inside your stitches (tapestry crochet method) to keep the fabric dense and prevent colors from showing through.
- To achieve a smooth look, work into the back loop only (BLO) or use Yarn Under/Yarn Over (YU/YO) technique for Single Crochet.
- Color changes (CC) are made in the last step of the stitch before the new color is needed.
I. The Main Square (Body and Background)
- Foundation: With G (Green) yarn, Ch the number of stitches required for your desired width (e.g., Ch 60).
- Rows 1 – X: Sc across the row, Ch 1, turn.
NOTE ON COLOR CHART (GRAPHGHAN)
- The complexity of the Santa face requires a color chart (graphghan) to follow the exact pixel placement for the R (Red), G (Green), and S (Skin Tone) colors.
- Without a specific chart, the step-by-step instructions for color changes cannot be provided row-by-row.
- Placement Guide (General):
- The bottom portion of the square is primarily R (Red) for the coat.
- The middle section involves R, G, and S (Skin Tone) for the face and hat.
- The top section is mostly G (Green) for the background.
- Use B and Y for tiny details like the belt buckle near the bottom.
II. The Textured White Details (Beard, Hat Trim, Scarf)
These sections are crocheted on top of the finished Tapestry Square to add dimension.
A. Hat Trim and Scarf (Flat Overlay)
- Hat Trim: Join W (White) yarn with an sl st along the lower edge of the Red hat section. Sc evenly across this edge, then switch to a textured stitch like hdc or sc in BLO for 2-3 rows to give the brim thickness. Fasten off.
- Scarf: Join W at the neck/collar line. Work a strip of sc rows downwards for the scarf, or make a separate long strip and sew it on. Add a buckle shape using Y yarn.
B. The Scalloped Beard (Shell Stitch Overlay)
This highly textured beard is created using a shell stitch working outwards from the face.
- Preparation: Locate the bottom curve of the face (Skin Tone/S). Join W (White) yarn with a sl st to the center bottom of the face area.
- R1 (Beard Foundation): Ch 1, sc evenly along the bottom curve of the face, making sure the stitch count is divisible by 6 (or the number required for your shell repeat). Sl st to join.
- R2 (Scallop Row): Ch 1, sc in the first st, sk 2 sts, (3 dc, ch 1, 3 dc) in the next st, sk 2 sts. Repeat from * around the curve of the beard. Sl st to join.
- R3 (Next Layer): Sl st to the center of the first Shell (the ch-1 space). Ch 1, sc in the ch-1 space of the first shell, then (3 dc, ch 1, 3 dc) in the sc between the shells of the previous row. Repeat from * around. This staggers the shells, creating a second, fuller layer.
III. The Final Border
The border shown in the image is a thick, multi-layered shell border.
- R1 (Inner Border/Green): Join R (Red) yarn to any corner. Ch 1, sc evenly around the entire square. Work 3 sc in each corner st to keep the square flat. Sl st to join.
- R2 (Inner Border/Red): Ch 1, sc in each st around, with 3 sc in each corner st. Sl st to join.
- R3 (Outer Border Foundation/Green): Join G (Green) yarn. Ch 2 (counts as hdc), hdc in each st around, with 3 hdc in each corner st. Sl st to join.
- R4 (Final Scalloped Edge/Green): Ch 1, sc in the first st, sk 2 sts, (5 dc) in the next st, sk 2 sts. Repeat from * around. The pattern should end with a sc in the last stitch and sl st to join. Adjust the skip count as necessary to ensure the shells lay flat, especially around the corners.
IV. Finishing and Embellishments
- Embroider: Use B (Black) yarn to embroider eyes and R (Red) for the mouth, or a small piece of W (White) yarn for the mustache.
- Snowflakes: Stitch or glue small crocheted snowflakes or glittery star appliques to the green background.
- Weave: Weave in all yarn ends securely on the back of the work.


