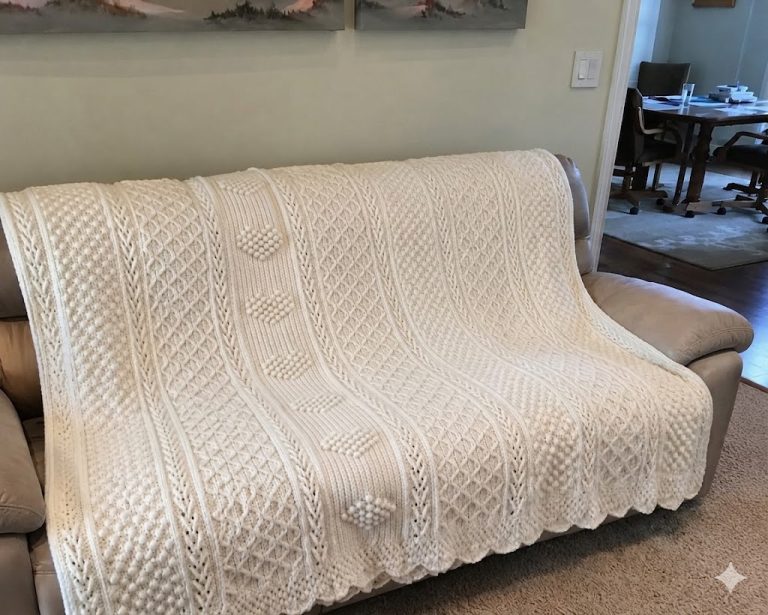
Crochet Cap Pattern: Step-by-Step Guide (English)
This pattern uses two main stitch types: a decorative lace stitch for the body and single crochet/post stitches for the brim.
I. Materials & Tools
- Yarn: Medium weight yarn (cotton or cotton blend is best for structure and breathability). The image suggests a natural, light color.
- Hook: A hook size appropriate for your yarn (e.g., 4.0mm or 4.5mm).
- Notions: Scissors, yarn needle, and a tape measure.
II. The Crown/Body (Lace Stitch Section)
The body of the hat is worked in the round, starting with a magic ring and increasing until the desired diameter for the hat size is achieved.
1. Foundation (Magic Ring):
- Start with a Magic Ring (or Chain 4, slip stitch to join).
- Round 1: Chain 2 (counts as one stitch). Work 10-12 Half Double Crochet (HDC) into the ring. Slip stitch to join.
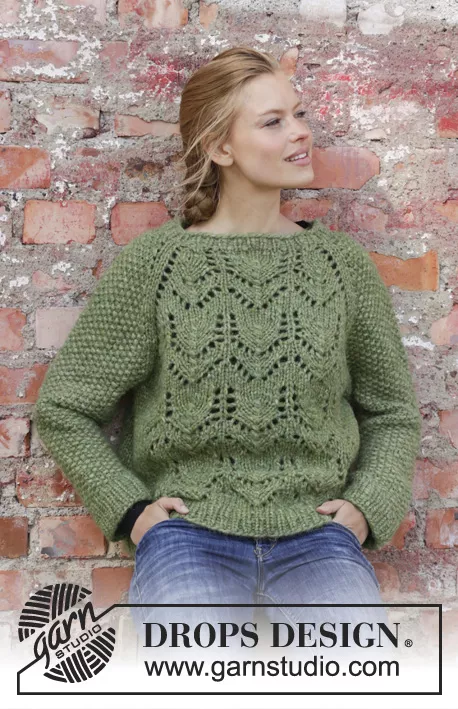
2. Increasing the Crown (The Lace Pattern):
- The Lace Stitch: The body uses a repeating Star Stitch (or similar) separated by chain spaces. The instructions here are general; you will need to find a specific pattern for the exact stitch count.
- Rounds 2 – 8 (Increasing): Begin the decorative stitch pattern. You will need to increase the stitch count evenly each round to keep the piece flat.
- General Rule: Follow the pattern’s increase instructions until the diameter of the flat circle reaches the diameter of your head (e.g., 6 to 7 inches for an adult).
3. Straight Sides:
- Rounds 9 – 15 (No Increase): Once the diameter is right, continue the lace stitch pattern without increasing. This forms the straight sides of the hat. Continue until the hat reaches the top of your ears.
4. The Bottom Band:
- Rounds 16 – 17: Switch to a denser stitch for the brim base. Work 2 rounds of Single Crochet (SC). Join and fasten off.
III. The Brim/Visor Structure
The brim is worked in rows, not in the round, using firm stitches to maintain shape.
- Mark the Brim: Identify the center front of the hat and mark the ends of where you want the brim to start and end (typically covering about $1/3$ of the total circumference).
- Row 1 (Brim Foundation): Attach the yarn at the first marker. Chain 1. Work a row of SC across to the second marker. Turn.
- Rows 2 – 6 (Shaping): Continue working SC rows. You will likely need to decrease at the ends of the rows (SC two stitches together) to create the slight curve of the brim.
- Stiffening (Optional): Many patterns incorporate a piece of plastic canvas or stiff wire/plastic cut to the brim shape between the layers to give it firmness.
- Final Edging: Once the brim shape is complete, work a final round of Single Crochet (SC) or Slip Stitch (SL ST) around the entire perimeter of the brim for a clean, finished edge.
IV. Finishing
- Weave in all loose ends securely with a yarn needle.
Crochet Baseball Cap Tutorial (General Construction)
- Focus: This tutorial is very comprehensive and covers the full structure, including how to make the visor/brim and put the cap together.
- Source: YouTube (Diamond Alexis)
- Link:
https://www.youtube.com/watch?v=YrIBAeMx55Y