Crochet Floral Summer Dress Pattern Outline

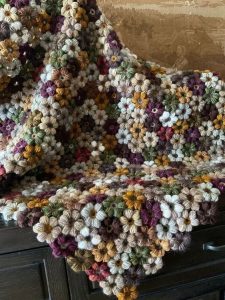
If you are building or renovating and are preparing to enter the finishing phase, you are certainly faced with the following question: how to apply plaster or putty on the walls? Currently the alternatives and methods used in civil construction are the most diverse and it is really complicated to decide which is the best process for your work. Both plaster and plaster are used to fill imperfections and level masonry surfaces that are in damp environments such as the living room, bedrooms and rooms other than the bathroom and kitchen. In this post you can see more about it and learn how to make a beautiful Modified Catherine’s Wheel Stitch Baby Blanket.
The application of spackle and plaster is very similar, both can be done with a steel trowel or steel spatula, two or three coats so that the finish is perfect the way you expect. Positives and advantages of plaster: Does not need sealer application before application; It dries much faster than pasta; It can be applied directly on concrete; The application is fast which saves you time; Lower cost.
To put plaster on the wall you will need the following materials: PVC and steel straightener; Trowel or trowel; 2m aluminum ruler; Aluminum angles; Plaster bags in sufficient quantity for the application of the area.
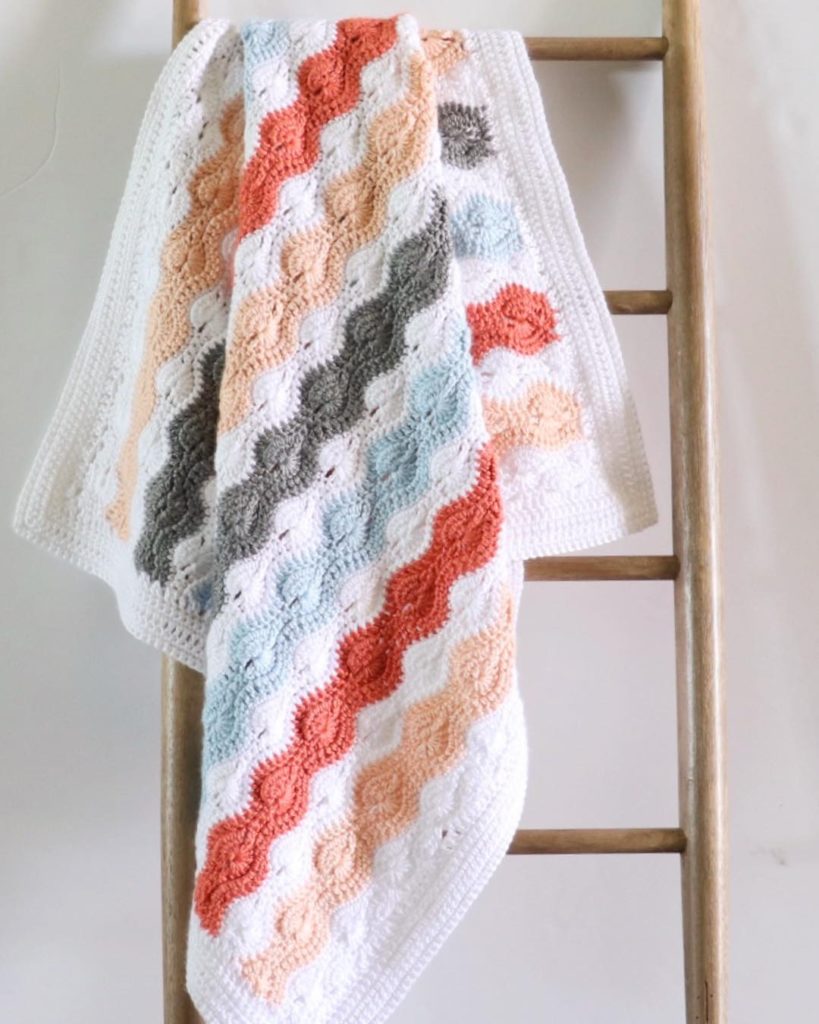
Free Pattern Available: Modified Catherine’s Wheel Stitch Baby Blanket
How to plaster the wall step by step
1. Surface preparation
For the application of plaster to be done efficiently and quickly, it is necessary that the surface is level, without burrs. Ideally, the electrical part has already been completed, the hydraulic part also, stops stuck in the masonry and air conditioning infrastructure already installed. It is important to wait at least 30 days after lifting the walls and ceilings to apply the plaster coating so that there is no problem, as in this period the mortar has already hardened and will not suffer deformations, the concrete has already settled and the plastering too . Remove dirt, nails and any object that may hinder the application of the coating. Make sure the walls are flat.
2. Plaster mix
Plaster packs are sold, in general, in 40kg bags, in powder. The plaster powder needs to be mixed in water, in a proportion of 36 to 40 liters of water for each bag and must follow a specific order: Fill the mixer with water and sprinkle the powder so that it fills the mixer evenly so that . Let the dough rest for a period of 8 to 10 minutes for the powder to dissolve. Then, part of the paste should be mixed, leaving the rest still on the mixer. Let the mixture stand for a further period of 3 to 5 minutes to induce the paste. Observe the consistency of the paste, after this second waiting period, it can now be applied to the walls without problems. At the end of the application of this first part of the mixture, the rest that has remained at rest will be ready for use without the need for mixing.
3. Surface application
Using the smooth plaster cast
Always start the application from top to bottom and protect the floor from debris and spatter of dough covering everything with canvas. Use angles to finish corners and corners, they protect corners. Wet the walls before applying the dough and, on the ceiling, apply with a PVC trowel in back and forth movements. Then start the application on the walls, always from top to bottom as we said. Be careful with the thickness, it should be between 1 and 3mm. The second coat must be applied immediately afterwards, in a crosswise direction to the first layer and with the aluminum ruler you must remove the excess and check the thickness according to the determined references. Use the steel trowel to level the surface well, leave it well leveled so that it looks perfect, eliminate ripples and flaws. Finally, apply the last layer to correct possible flaws and reach the desired final thickness. The final performance must be done very carefully and carefully until the surface is smooth and even.
Are you enjoying it? Also check out these Free Patterns:


