Crochet Floral Summer Dress Pattern Outline

Because its crocheted using several yarns held together, you can really use nearly any thickness of yarn to achieve the desired yarn weight. Hold 2-3 strands together for thick yarn or 5-6 strands for thin yarn (or any combination of the two). I’ve used yarn as thin as 4ply (fingering), right through to Super Bulky.
It doesn’t matter what colours you use because mixing up the yarns makes a pleasant speckled effect which disguises even the ugliest of colours. Variegated yarns seem to work especially well.
Don’t worry about mixing fibers, it’s unlikely you’ll need to launder this project, so combining cotton, acrylic and wool is fine.
Using up yarns from your stash is free, so it’s the perfect money saving craft project to keep you busy right now.
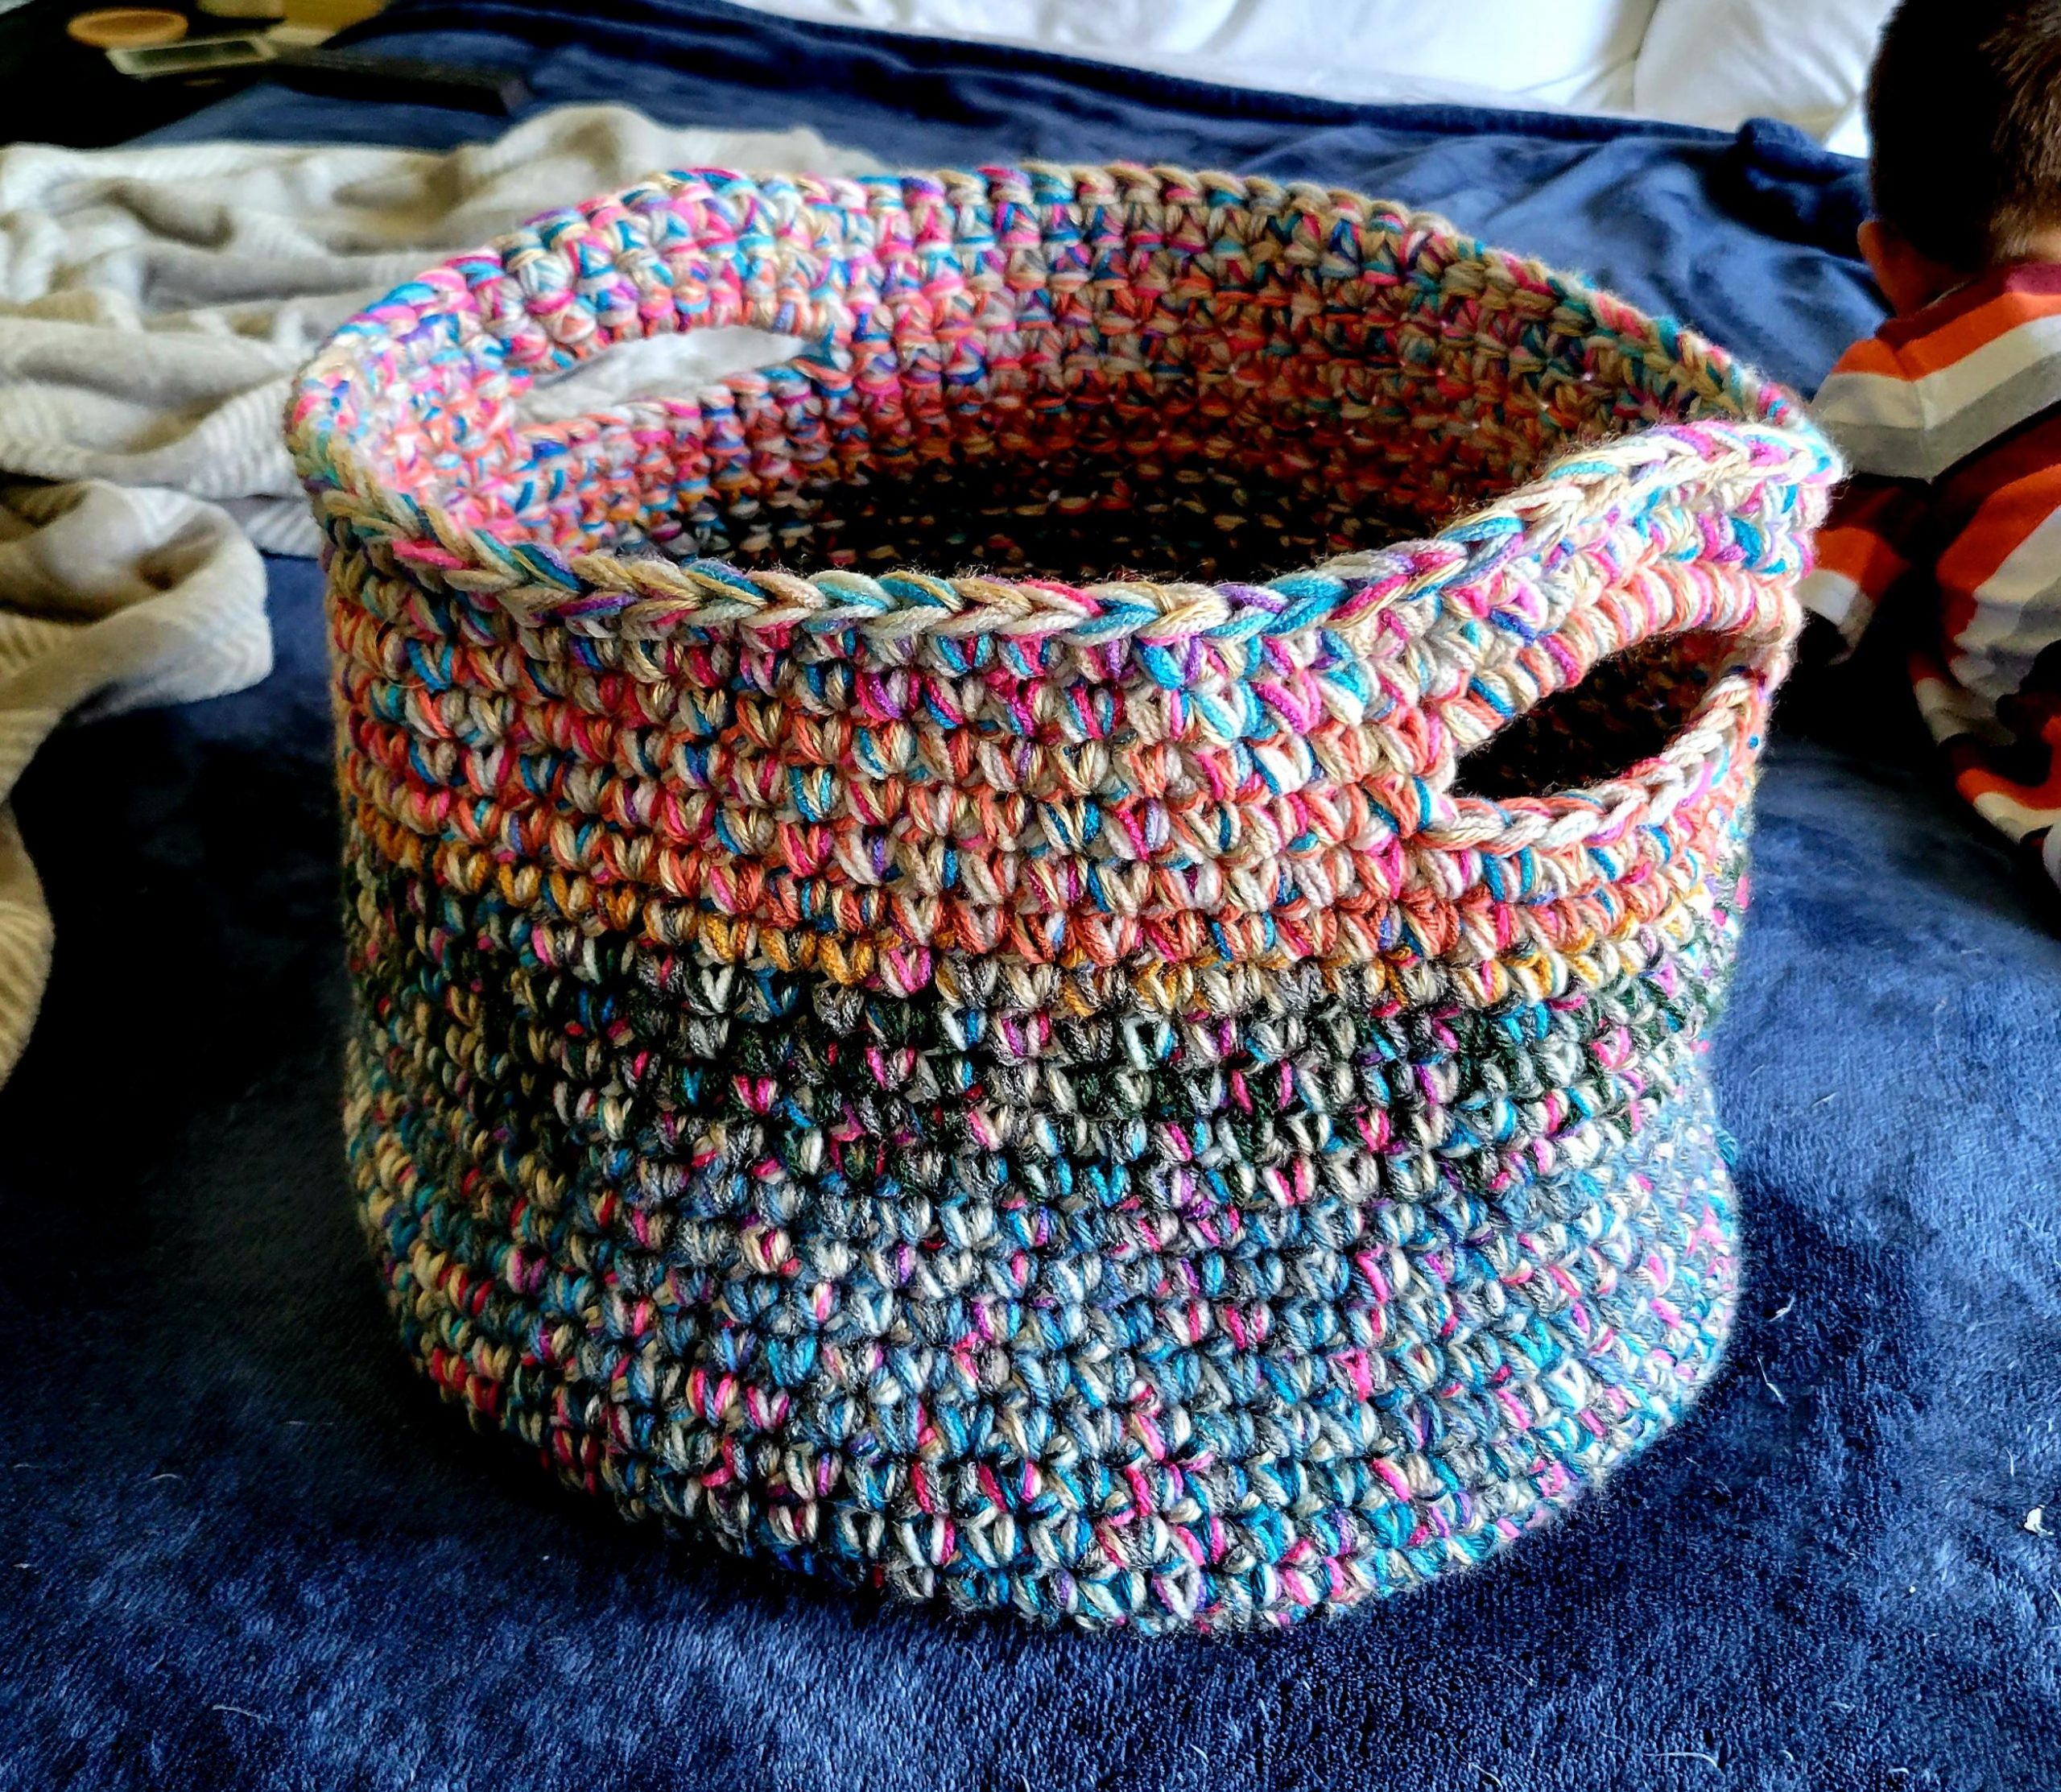
This crochet basket is a real yarn eater! In short, making a scrap yarn crochet basket is the perfect way to use up leftover yarn from random projects and get rid of all that ugly yarn taking up precious space.
Rather than a crochet basket pattern, I’ve written more of a ‘How to make a Crochet Basket’ recipe. No matter what kind of yarn you use, my crochet basket instructions will help you make a super practical scrap yarn basket every time.
I’ve included a finished size and hook recommendation, but once you know how, you can make your own basket in any size you like.
You’ll need to know some crochet basics to make this basket, but it’s fairly beginner friendly and stress free to make.
I used a 9mm hook and held about 4-5 stands of DK (8ply) yarn together to make a really firm fabric with Single crochet (US) stitch, (Dc UK).
The finished gauge is around 9.5st and 10 rows per 4″ sq (10x10cm). You can make a little sample swatch before you start, but gauge is not super crucial. The important thing is to get a really tight robust crochet fabric, so adjust your hook size up or down as needed so the stitches are quite tight.
A firm fabric will help the basket stand on its own.
If you have lots of little yarn ends, make several balls of yarn just by knotting the ends together similar to a magic yarn ball, but the joins don’t have to be invisible.
The knots will be out of sight, inside the basket, so don’t waste your time joining ends too perfectly.
Finished size: 30cm (12″) tall, 35cm (13.5″) wide
Stitches used & Abbreviations – US terminology used
Magic loop
ch chain stitch
sc Single crochet (US) = double crochet (UK)
ss Slip Stitch
st(s) Stitch(s)
Pattern Notes:
This pattern is worked in the round (spiral). See instructions for how to make a Single Crochet stitch.
Several yarns are held together to create a super bulky weight yarn. Any knots should be positioned towards the inside of the basket.
1. Crochet the base of the basket using a basic circle pattern. The exact pattern will vary depending on the thickness of your yarn but use the following as a guide:
R1 – Make a Magic loop and sc 6 stitches into it
R2 – 2 sc into every st
R3 – (sc in next st, 2 sc in next st) around
R4 – (sc in next 2 sts, 2 sc in next st) around
As a general rule, with every round, you work one more regular stitch between your increase stitches.
Keep checking that your circle is laying flat.
If your circle shows signs of ruffling, pull back a couple of rounds and skip the increases for one round. Because you’re skipping a set of increases, you’ll have fewer stitches and hopefully a flatter edge.
Continue crocheting your base until the diameter reaches 35cm (13.5″) or your desired size. Around 17 rounds.
Final stitch count is irrelevant.
2. Once you are happy with the size of the base, continue to crochet sc in a spiral but with no increases. The sides will start to curl up and build the walls of the basket.

3. Continue to crochet until the walls reach about 25cm tall (10″), or about 25 rows.
4. Lay the project flat aligning the top edges. Mark the center stitch on both the front and back, measuring in from the sides, with a stitch marker.

5. To make a handle count 5 stitches out from each center stitch and place a stitch marker.

6. Single crochet up to and into the stitch with the 1st marker, chain 9, and then sc into the stitch with the 2nd marker. Continue sc around the basket and repeat on the opposite side.

7. On the next round, when you reach the chain, sc 9 stitches over the chain into the gap.


8. Crochet 2 more rounds to complete basket handles.

9. To finish, slip stitch the last few stitches, break off yarn and weave ends in.
All done! Time to enjoy your new basket.

Happy crochet! See you!