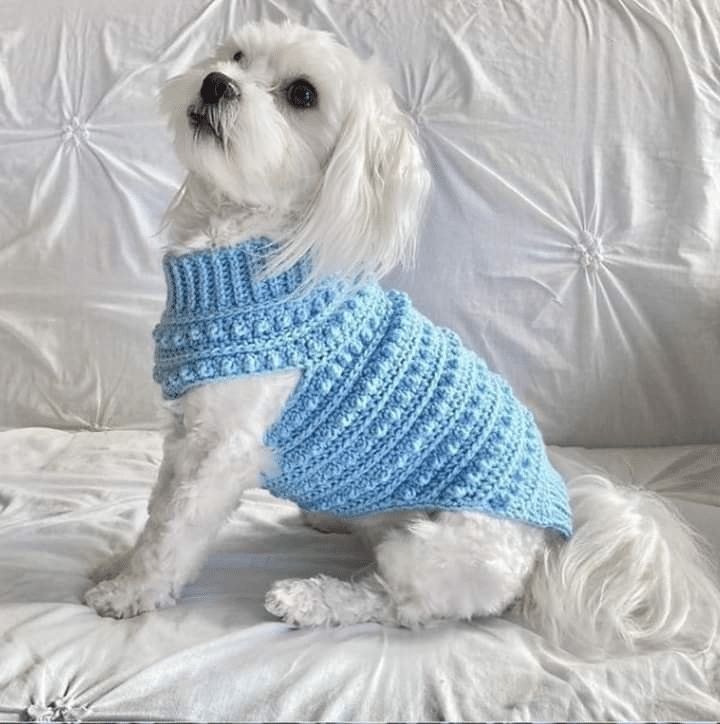
If you’re looking for a cute, cozy, and affordable way to keep your dog warm, this crochet dog sweater is the perfect project. This pattern is beginner-friendly, stylish, and customizable for small to medium dogs.
In this tutorial, you’ll learn exactly how to crochet a ribbed dog sweater with a turtleneck, just like the one in the image.
advertising
Why You’ll Love This Crochet Dog Sweater
Beginner-friendly pattern
Uses basic stitches only
Adjustable to fit any dog size
Perfect for cold weather
Great handmade gift idea
Materials You’ll Need
Medium weight yarn (Category 4 – acrylic or cotton blend)
Crochet hook (4.5 mm – 5.5 mm depending on tension)
Scissors
Yarn needle
Measuring tape
Measurements (Very Important!)
Before starting, measure your dog:
Neck circumference
Chest circumference (widest part)
Back length (from neck to tail base)
This pattern is customizable, so measurements matter more than fixed stitch counts.
advertising
Crochet Stitches Used
Chain (ch)
Slip stitch (sl st)
Single crochet (sc)
Half double crochet (hdc)
Back loop only (blo) – for ribbed effect
Step 1: Crochet the Turtleneck Collar
Chain enough stitches to match the height of the collar (about 8–12 cm).
Row 1: Starting in the 2nd chain, make single crochet (sc) across.
Row 2+: Chain 1, turn, work sc in back loop only (blo) across.
Repeat rows until the strip fits snugly around your dog’s neck.
Join the ends with slip stitches to form a loop.
Step 2: Build the Body (Working in Rounds)
Now you’ll crochet around the collar:
Evenly place half double crochets (hdc) around the collar edge.
Join with a slip stitch.
Step 3: Create the Ribbed Body Texture
To get that beautiful ribbed look:
Work hdc in back loop only (blo) in every round
Continue in rounds, increasing gradually to fit the chest
Increasing Tip:
Add 1–2 stitches evenly per round until it fits comfortably around your dog’s chest.
Step 4: Make Arm Holes
Once you reach the chest:
Mark where the legs should go
Chain 2–4 stitches (depending on dog size) and skip stitches underneath
Continue the round
This creates the arm openings.
Step 5: Continue the Body
Keep working in rounds after the arm holes
Maintain the ribbed pattern (blo stitches)
Stop when you reach the desired back length
Step 6: Shape the Bottom (Optional)
For a better fit:
Work shorter rows on the belly side
Keep the back slightly longer
Step 7: Finishing Touches
Fasten off and weave in all ends
Optionally add a border using single crochet around edges
You can also add buttons or decorations
Tips for the Perfect Fit
Always try the sweater on your dog as you go
Make sure it’s snug but not tight
Stretchy stitches help with comfort
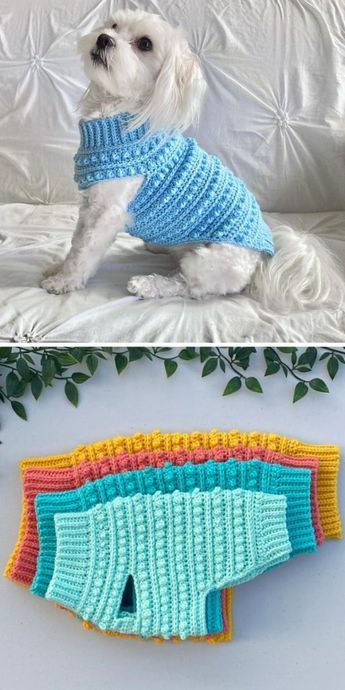
Customization Ideas
Use different colors (pastel, neutral, bold)
Add stripes or textures
Include a leash hole on the back
Make it sleeveless or add short sleeves
Final Thoughts
This crochet dog sweater pattern is simple, stylish, and perfect for beginners. With just basic stitches and a little patience, you can create a cozy handmade outfit your dog will love.
Whether you’re crocheting for your own pet or selling handmade items, this project is a great addition to your crochet collection.
