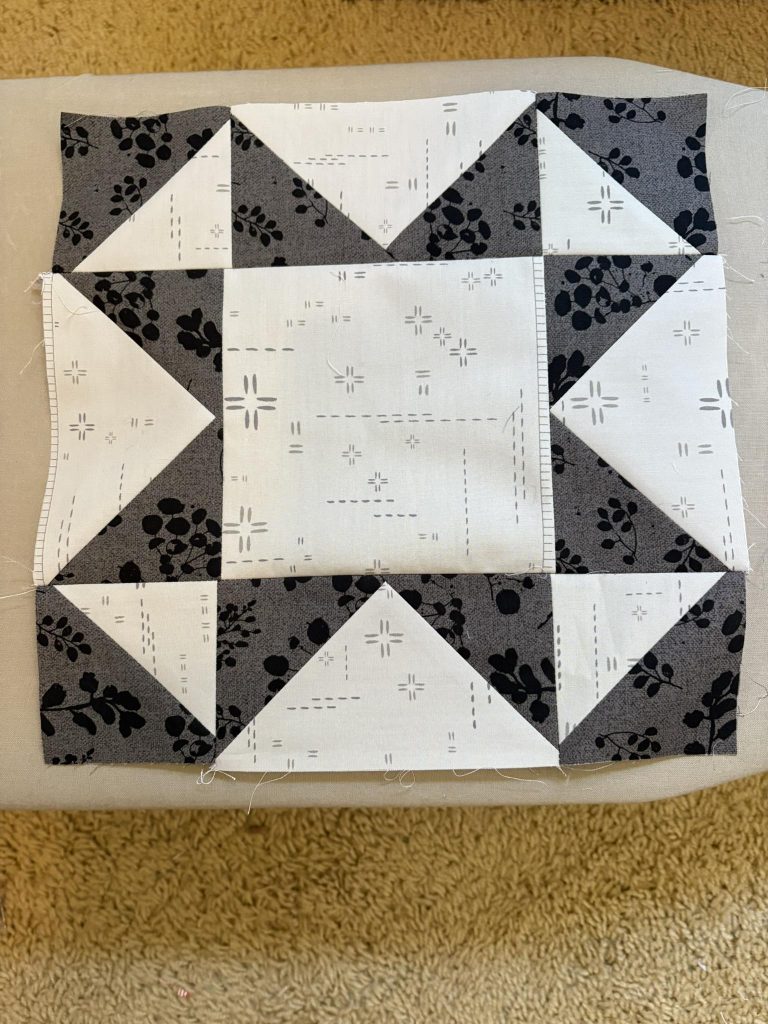
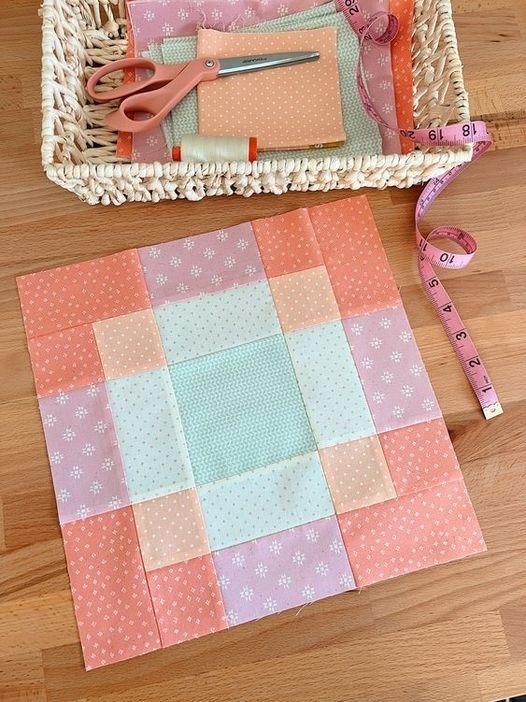
Economy Block

This quilt block is a variation of the classic Economy Block, sometimes also called a Square-in-a-Square with Flying Geese Border. The center features a large square, and it is framed on all four sides by flying geese units that create strong directional movement around the middle. It is a beautiful block for modern quilts because it highlights contrast and negative space while keeping the construction relatively simple.
For this tutorial, we will describe a 12” finished block (12½” unfinished). You can easily adjust the measurements proportionally for a larger or smaller version.
Center Square
Flying Geese Units (you will need 8 total)
Each flying geese unit in this layout finishes at 3” x 6” (3½” x 6½” unfinished).
For 8 flying geese units:
Place one 3½” square right sides together on one end of a 3½” x 6½” rectangle. Draw a diagonal line from corner to corner on the square. Stitch directly on the line, trim ¼” away from the seam, and press the triangle open. Repeat on the opposite side of the rectangle using a second 3½” square, stitching along the diagonal line, trimming excess fabric, and pressing open. You now have one flying geese unit measuring 3½” x 6½”. Repeat this process until you have 8 flying geese units total.
Accuracy is important here. Make sure your points are crisp and that your seam allowances are exactly ¼” so your block finishes neatly.
Take two flying geese units and place them side by side so the triangle points face inward toward the center of the block. Sew them together along the short side. Press the seam open or to one side. This creates a row measuring 3½” x 12½”. Repeat to create a second identical row for the opposite side.
These two rows will become the top and bottom borders of the center square.
Sew one flying geese row to the top of the 6½” center square. Press the seam allowance toward the flying geese or open, depending on your preference. Then sew the second flying geese row to the bottom of the center square. After pressing, your unit should measure 9½” x 12½”.
Take the remaining four flying geese units. Sew two together along the short side, again making sure the triangle points face inward toward the center when attached. Repeat for the remaining two units.
These two vertical strips will measure 3½” x 12½”.
Sew one strip to the left side of the block and press. Then sew the second strip to the right side. Press carefully, keeping the block flat.
Your block should now measure 12½” x 12½” unfinished (12” finished in the quilt).
